
How to Configure Intune Endpoint Privilege Management (EPM): A Practical Guide
What Is Endpoint Privilege Management?
Endpoint Privilege Management (EPM) is a feature built into Microsoft Intune that lets standard users run specific applications with elevated privileges without making them local administrators.
The problem it solves is straightforward. Users sometimes need admin rights to install software or run certain tools. The usual answer is either giving them full local admin access (which is a security risk) or routing everything through IT (which is slow). EPM sits in the middle you define exactly what can be elevated by whom and under what conditions.
EPM requires one of the following licenses:
- Microsoft Intune Plan 2
- Microsoft Intune Suite
It is not included in the standard Intune Plan 1 / Microsoft 365 Business Premium licenses.
INTUNE CONFIGURATION
In this post we’ll cover two scenarios:
- Support-approved elevation — user requests elevation, a support engineer approves it from the Intune portal
- User-initiated elevation — a specific application is allowed to be elevated by a defined group, no approval needed, using a publisher certificate rule
If you prefer a video walkthrough, you can watch the full tutorial below. In this video, I demonstrate how to configure Intune Endpoint Privilege Management (EPM) step by step.
Support-Approved Elevation
Step 1: Create the Elevation Settings Policy
Navigation: Endpoint security › Endpoint Privilege Management › Policies
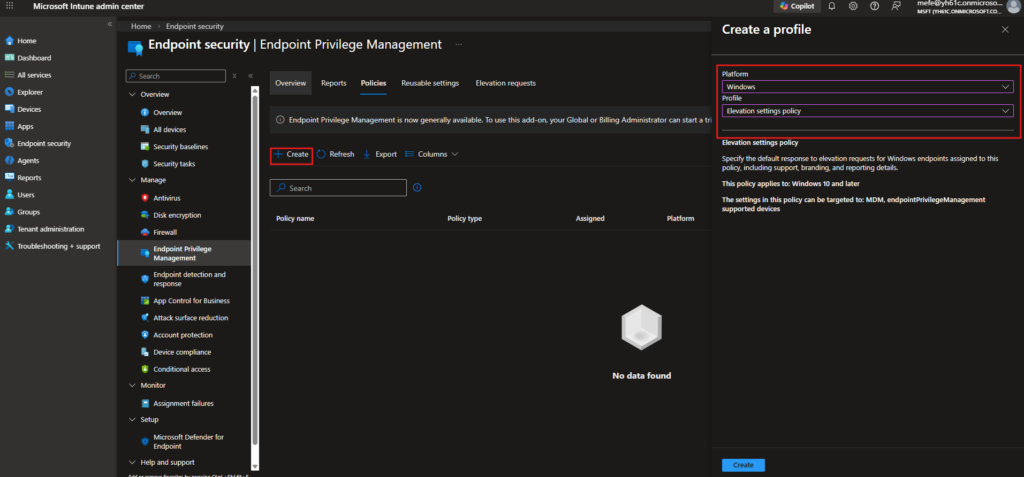
Go to Endpoint security in the left menu, select Endpoint Privilege Management, and navigate to the Policies tab. Click + Create.
In the flyout that opens, set the following:
| Setting | Value |
|---|---|
| Platform | Windows |
| Profile | Elevation settings policy |
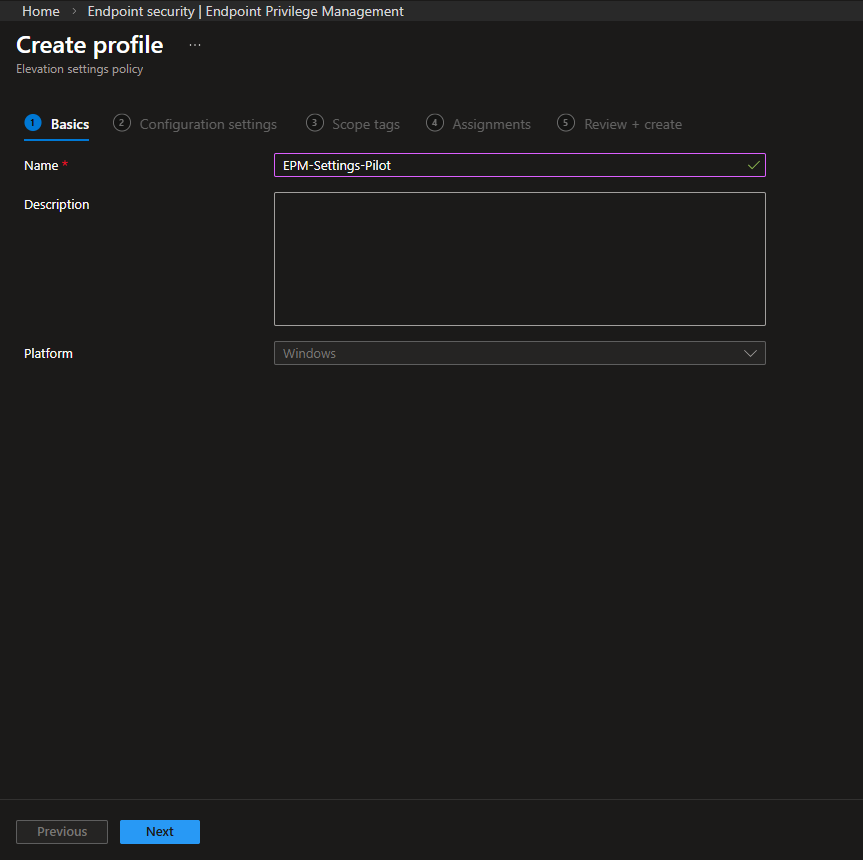
Step 2: Basics Tab
Give the policy a name. I used EPM-Settings-Pilot here. Platform is fixed as Windows. Click Next.
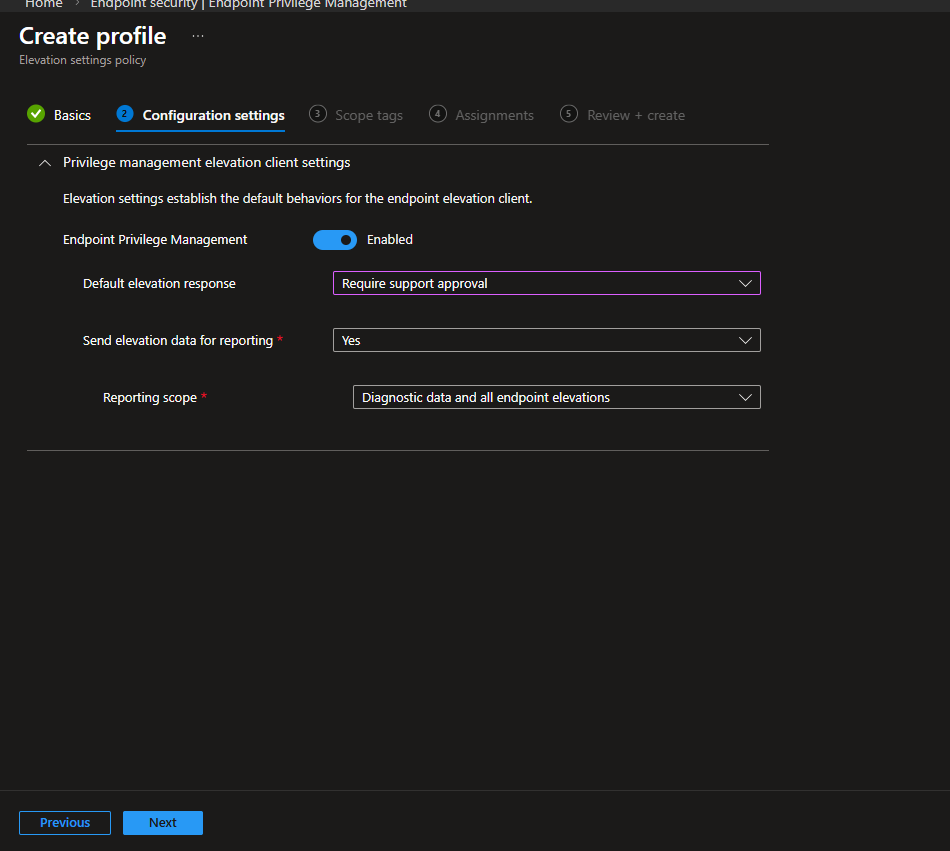
Step 3: Configuration Settings
This is where you define how EPM behaves on the device.
| Setting | Configured Value |
|---|---|
| Endpoint Privilege Management | Enabled |
| Default elevation response | Require support approval |
| Send elevation data for reporting | Yes |
| Reporting scope | Diagnostic data and all endpoint elevations |
Default elevation response is the key setting here. With Require support approval selected, any elevation request from a user lands in the Intune admin center and waits until an admin acts on it. Elevation Rules which we’ll cover in Part 2 override this default behavior for specific applications.
Setting the reporting scope to Diagnostic data and all endpoint elevations ensures every elevation attempt, successful or not, is captured in reporting. Useful to keep this wide open especially during a pilot.
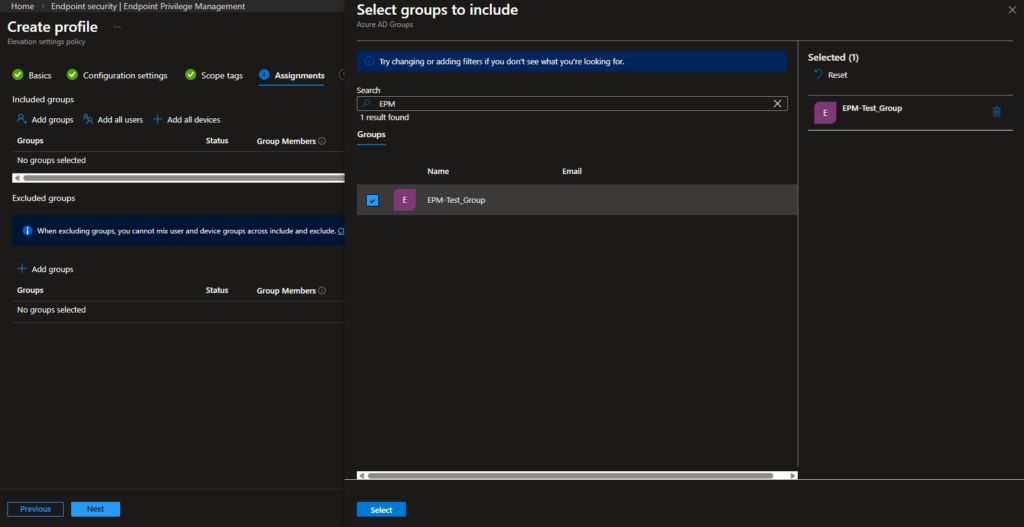
Step 4: Assignments
I assigned this policy to EPM-Test_Group the group containing the standard users we’re testing EPM with.
On the Review + create step, confirm your settings and create the policy.
Step 5: User Side – Requesting Elevation
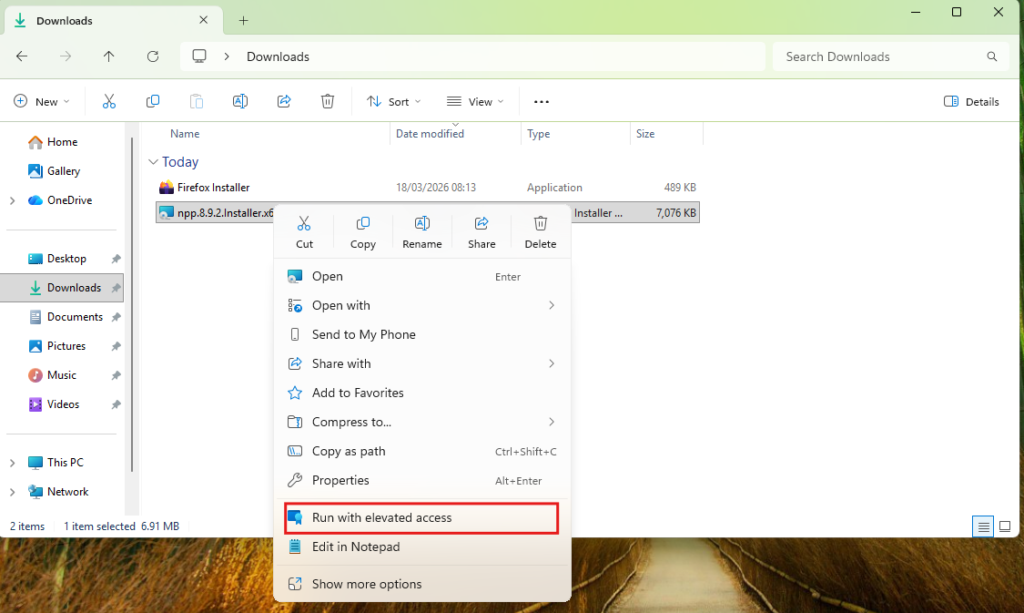
Once the policy reaches the device, standard users will see a Run with elevated access option when they right-click an application. This is added by the EPM client not the standard Windows UAC prompt.
In this scenario I used the Notepad++ installer as the test file.
Step 6: Submitting the Request
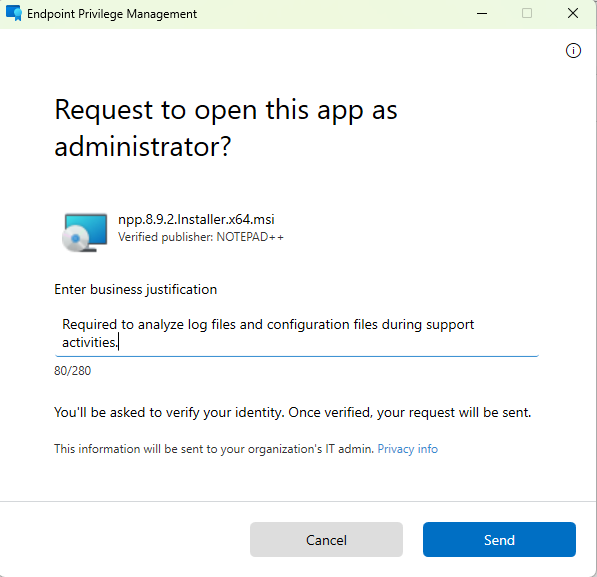
Clicking Run with elevated access opens the EPM client dialog. The user is asked to enter a business justification this text is what the admin will see on the other end. After hitting Send, the user goes through an identity verification step. Once verified, the request is submitted to Intune.
Step 7: Reviewing and Approving the Request
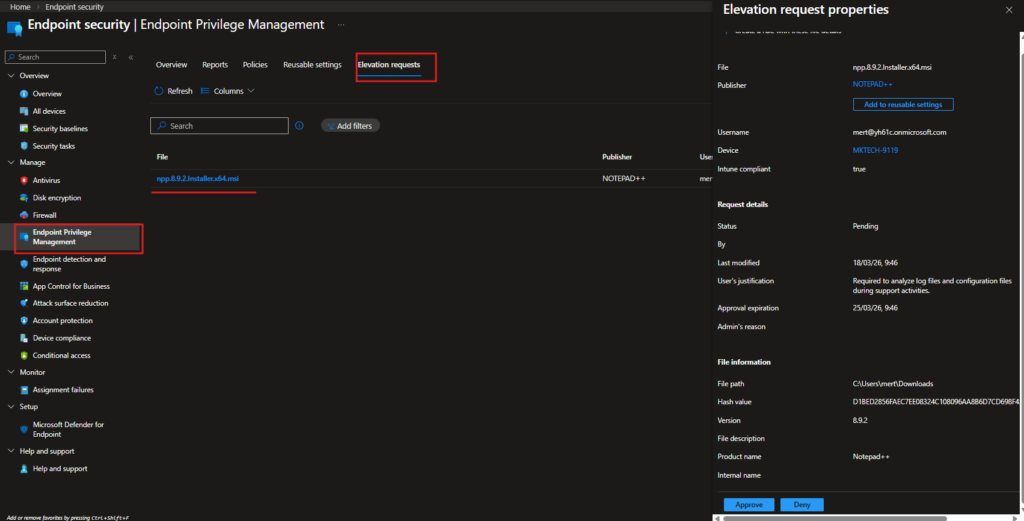
The submitted request appears in the Intune admin center under Endpoint security › Endpoint Privilege Management › Elevation requests.
Clicking on the request opens the Elevation request properties panel on the right, showing everything the admin needs to make a decision:
| Field | Value |
|---|---|
| File | npp.8.9.2.Installer.x64.msi |
| Publisher | NOTEPAD++ |
| Username | mert@yh61c.onmicrosoft.com |
| Device | MKTECH-9119 |
| Intune compliant | true |
| Status | Pending |
| User’s justification | Required to analyze log files and configuration files during support activities. |
| Approval expiration | 25/03/26, 9:46 |
| File path | C:\Users\mert\Downloads |
| Hash value | D1BED2856FAEC7EE08324C… |
| Version | 8.9.2 |
The admin reviews the justification, file details, and device compliance status, then hits Approve or Deny.
User-Initiated Elevation with a Publisher Certificate Rule
Before jumping into the configuration, it’s worth explaining why we’re using a publisher certificate here instead of a file hash.
A file hash is unique to a specific version of a file. Every time the application gets updated, the hash changes which means you’d need to update the rule every single time a new version is released. For a one-off scenario this might be fine, but in production it becomes a maintenance headache fast.
A publisher certificate, on the other hand, is tied to the software vendor’s code signing identity. As long as the application is signed by the same publisher, the rule stays valid across version upgrades. For well-known, trusted software this is the more practical and sustainable approach.
Step 1: Export the Publisher Certificate from the Application
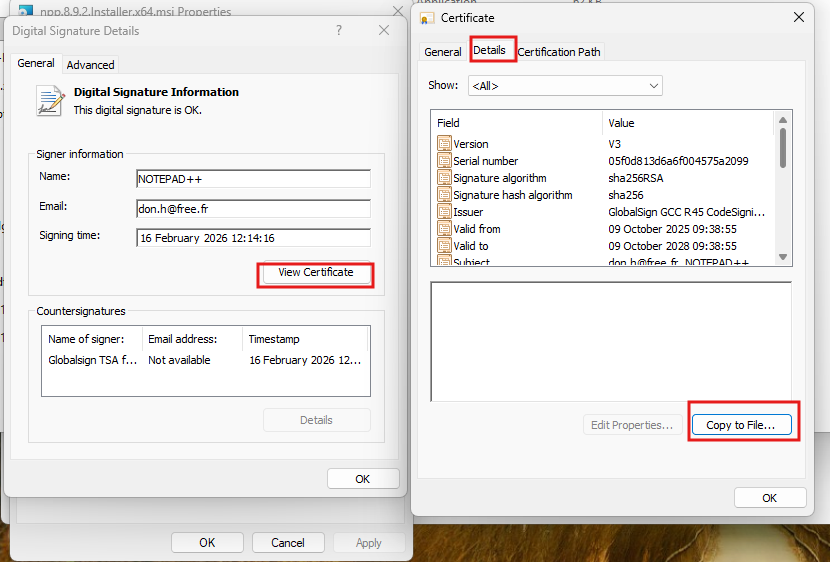
Right-click the installer file and open Properties, then go to the Digital Signatures tab. Select the signature entry in this case NOTEPAD++ and click Details.
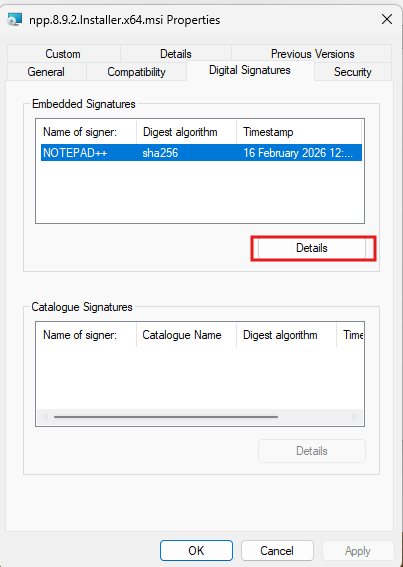
In the Digital Signature Details window, click View Certificate. This opens the certificate. Switch to the Details tab and click Copy to File to launch the Certificate Export Wizard.
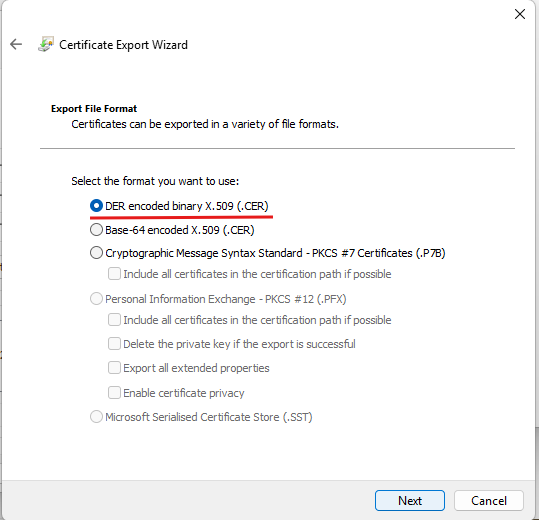
In the export wizard, select DER encoded binary X.509 (.CER) as the format and click Next.
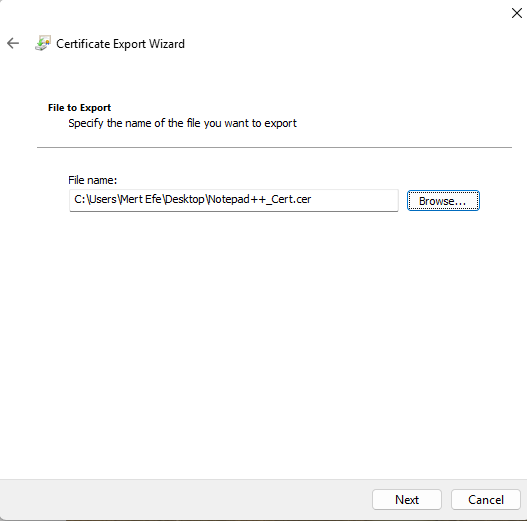
Give the file a name and save it somewhere accessible I used Notepad++_Cert.cer on the Desktop.
Step 2: Upload the Certificate to Intune as a Reusable Setting
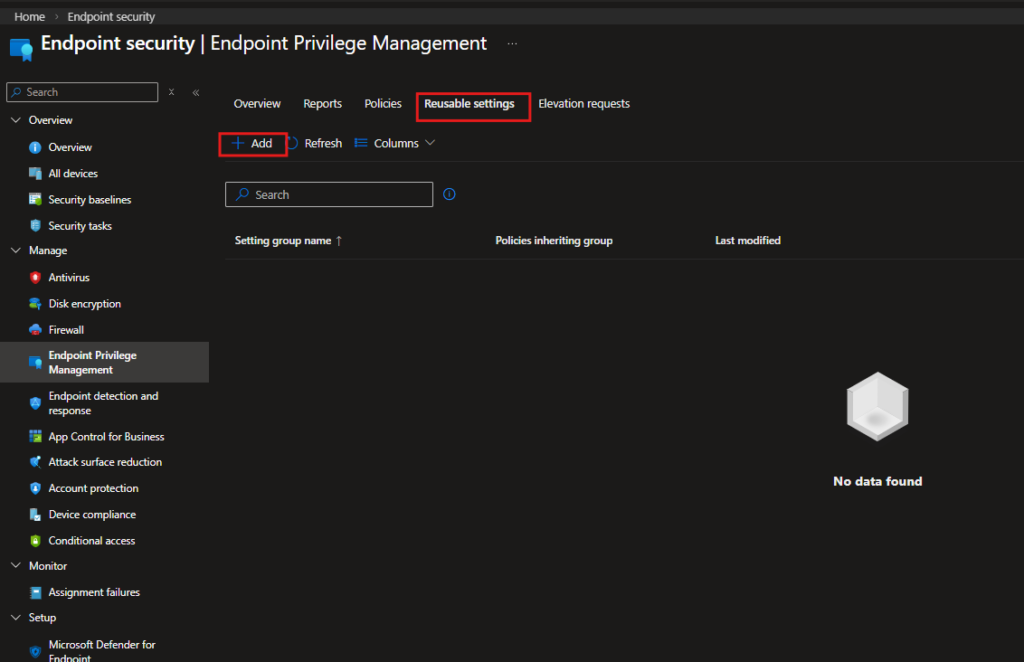
Navigation: Endpoint security › Endpoint Privilege Management › Reusable settings
Go to the Reusable settings tab and click + Add.
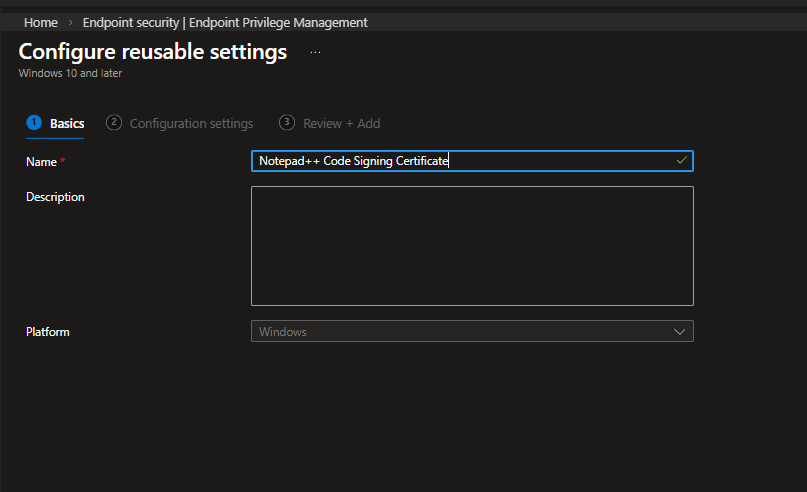
On the Basics tab, give it a descriptive name. I used Notepad++ Code Signing Certificate.
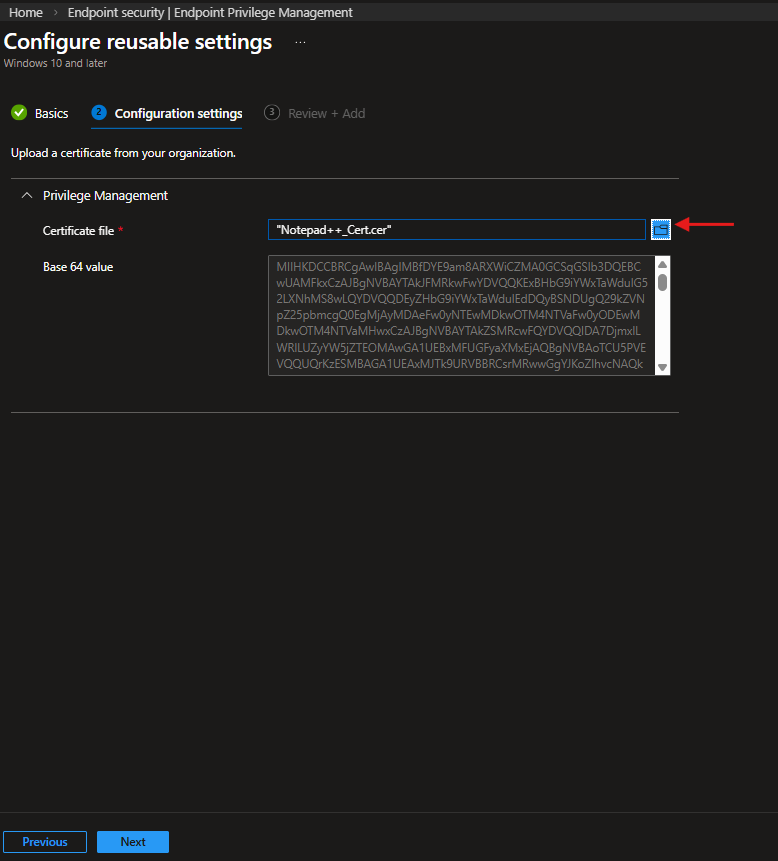
On the Configuration settings tab, upload the .cer file you exported. Once uploaded, Intune reads the certificate and populates the Base64 value field automatically.
Step 3: Create the Elevation Rules Policy
Navigation: Endpoint security › Endpoint Privilege Management › Policies
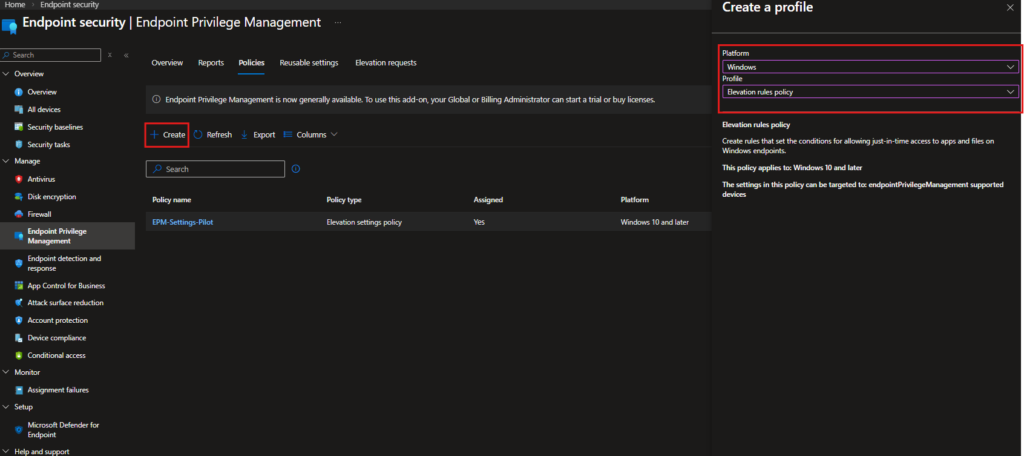
Back in the Policies tab, click + Create. This time select Elevation rules policy as the profile type.
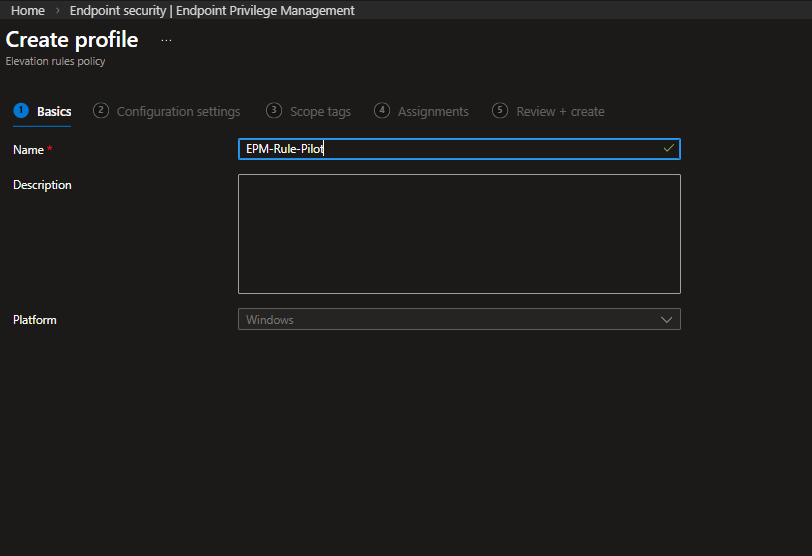
On the Basics tab, name the policy EPM-Rule-Pilot.
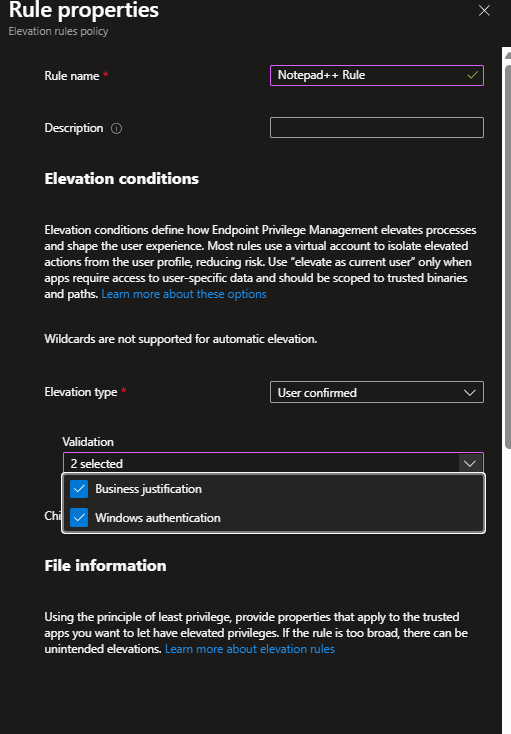
On the Configuration settings tab, click + Add to create a new rule. The Rule properties panel opens. Configure it as follows:
| Setting | Configured Value |
|---|---|
| Rule name | Notepad++ Rule |
| Elevation type | User confirmed |
| Validation | Business justification, Windows authentication |
Elevation type is set to User confirmed the user needs to actively confirm the elevation, but no admin approval is required. This is what separates it from the support-approved flow in Part 1.
Under Validation, both Business justification and Windows authentication are selected. The user will need to enter a reason and verify their identity before the elevation proceeds.
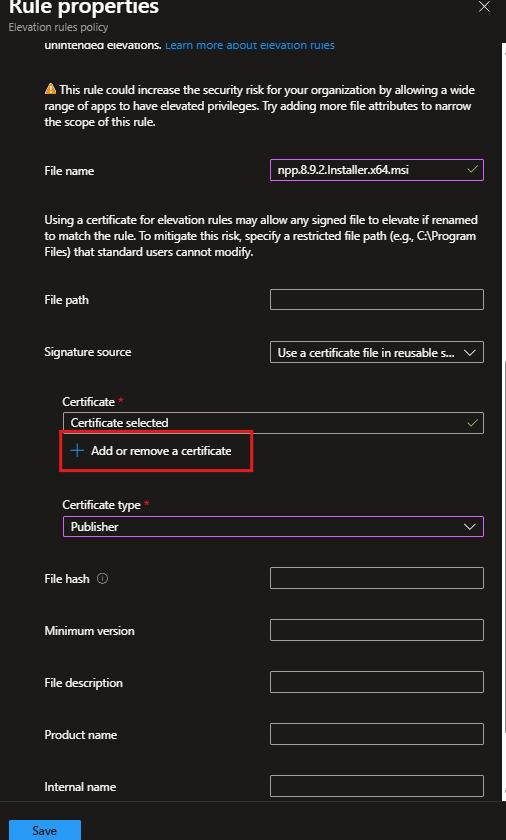
Scrolling down to the File information section:
| Setting | Configured Value |
|---|---|
| File name | npp.8.9.2.Installer.x64.msi |
| Signature source | Use a certificate file in reusable settings |
| Certificate | Notepad++ Code Signing Certificate |
| Certificate type | Publisher |
Setting the certificate type to Publisher means the rule validates the signing identity of the file not the specific version. Any future Notepad++ installer signed by the same publisher will match this rule without any changes needed.
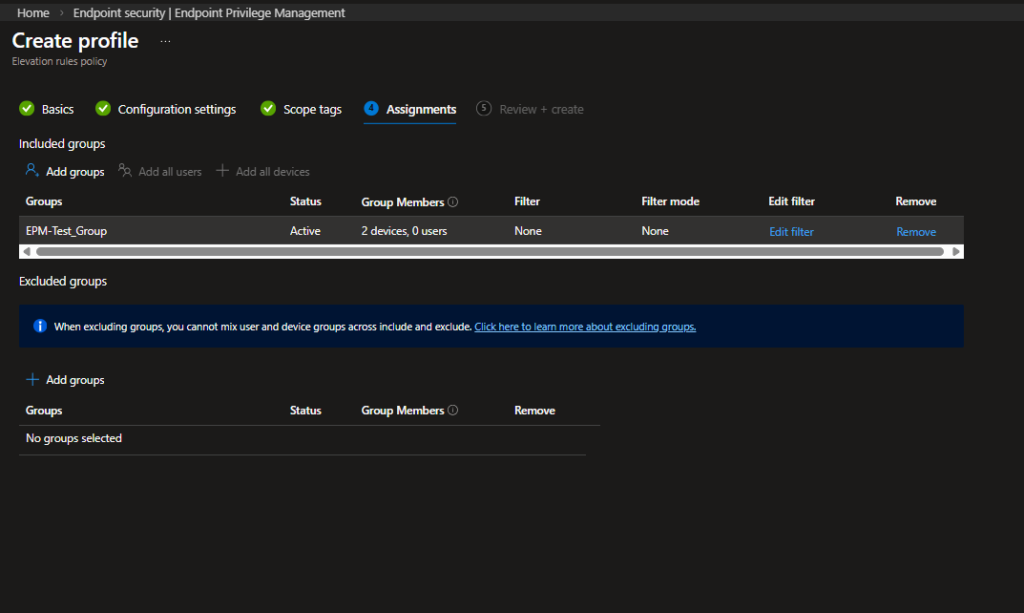
Step 4: Assign the Policy
Assign the policy to EPM-Test_Group, same as the Elevation Settings Policy.
Step 5: User Side – Elevation Without Approval
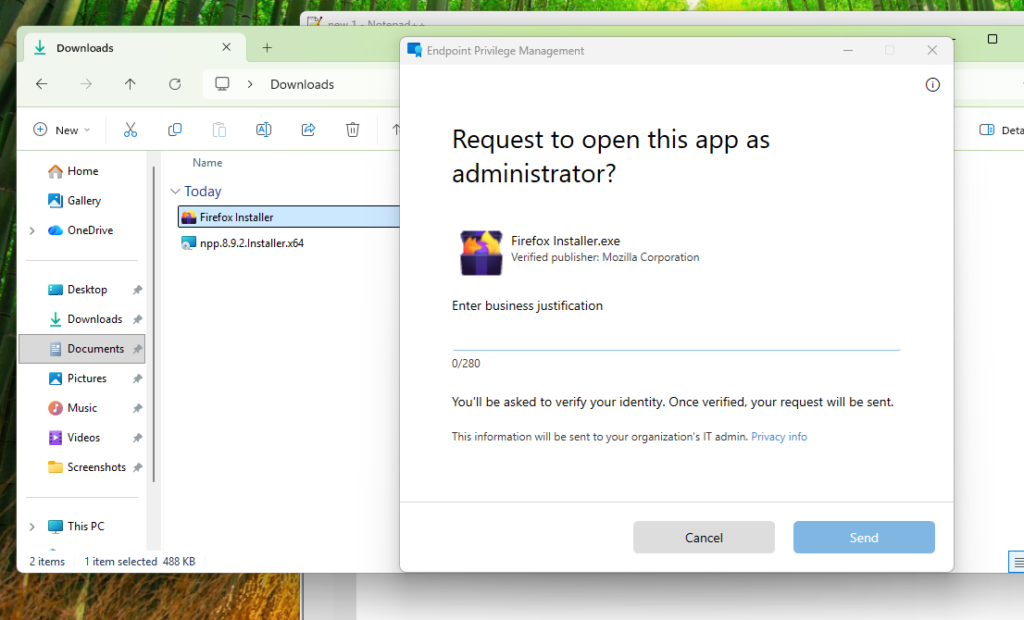
With the rule in place, the user experience changes significantly compared to Part 1. When the user right-clicks the Notepad++ installer and selects Run with elevated access, the EPM dialog appears as before but this time the request doesn’t go to an admin. The user enters a business justification and hits Send.
Windows then prompts for identity verification via PIN.
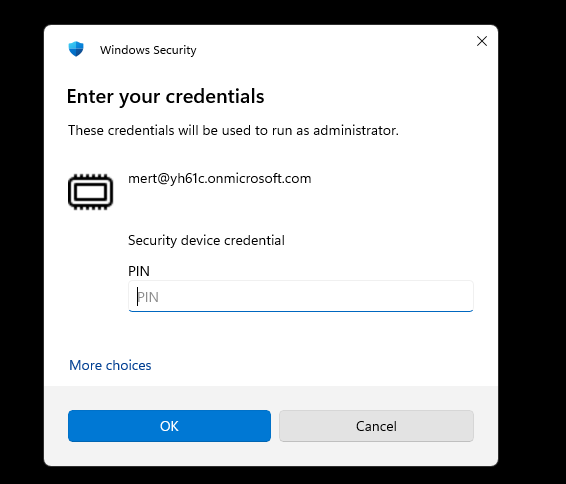
Once verified, the installer launches with elevated privileges immediately no waiting, no admin involvement. Notepad++ installs successfully.

To confirm the rule is working as intended and not just the default elevation behavior, I also tested with the Firefox installer which has no matching elevation rule. As expected, the EPM dialog appeared but this time it went through the support-approval flow, confirming that the publisher certificate rule is scoped correctly to Notepad++ only.
EPM is one of those features that looks simple on the surface but has a lot of depth once you start working with it in practice. The two scenarios we covered here represent the most common use cases you’ll run into a support-approved flow for ad-hoc requests, and a certificate-based rule for trusted applications that specific users need to run regularly.
The key takeaway is that these two approaches aren’t mutually exclusive. You can run them side by side: the Elevation Settings Policy sets the default behavior across your devices, and Elevation Rules override that default for specific applications where you’ve made a deliberate decision to allow user-initiated elevation. Everything is logged, everything is auditable, and your users never need local admin rights.
If you’re planning to roll this out, start with a small pilot group exactly as we did here with EPM-Test_Group. Get familiar with the Elevation requests tab in the portal, review what’s coming through, and build your rules based on real data rather than assumptions.