Secure WSUS SUP with SSL in SCCM 2503
In today’s enterprise IT environments, managing Windows updates in a centralized and secure way is a critical part of maintaining system stability, cybersecurity, and compliance. One of the key components in Microsoft Configuration Manager (SCCM) is the Software Update Point (SUP), which integrates with WSUS to deliver patches and updates across large infrastructures.
When WSUS is hosted on a remote server, enabling SSL-secured communication becomes not just a best practice, but a requirement. This ensures that all update metadata and synchronization traffic between SCCM and WSUS is encrypted, protecting your enterprise environment from potential risks.
In this series, we’ll walk through the step-by-step process of setting up a secure Software Update Point (SUP) in SCCM 2503, starting from creating a certificate in your Certification Authority (CA), configuring SSL on the WSUS server, updating IIS bindings, and finally, installing the SUP role in SCCM.
By the end, you’ll have a fully secured and SSL-enabled update infrastructure that’s ready for enterprise deployment reliable, scalable, and compliant with modern IT security standards.
Step 1: Creating a Certificate Template in the Certification Authority (CA)
Before configuring WSUS SSL in SCCM 2503, we first need to create a custom certificate template in our Certification Authority (CA). This certificate will later be used by the WSUS server to enable secure SSL communication.
Follow the steps below:
- Open the Certification Authority Management Console
- From the CA server, launch the Certification Authority console.
- Navigate to Manage to start creating a new template.

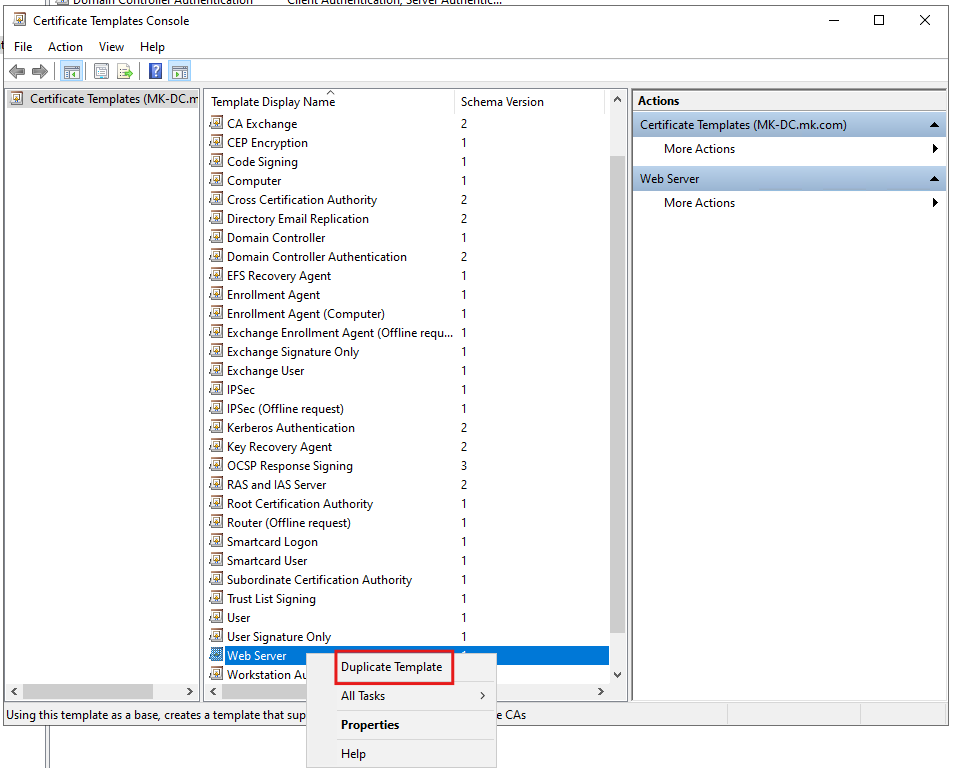
- Duplicate the Web Server Template
- In the templates list, locate the Web Server template.
- Right-click it and select Duplicate Template.
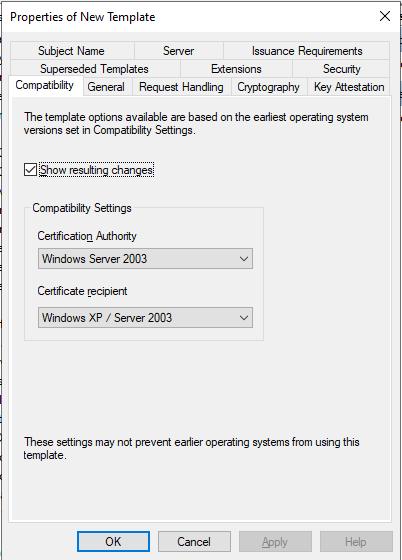
- Adjust Template Properties
- In the newly duplicated template, configure the following tabs:
- Compatibility: Ensure compatibility settings match your environment.
- In the newly duplicated template, configure the following tabs:
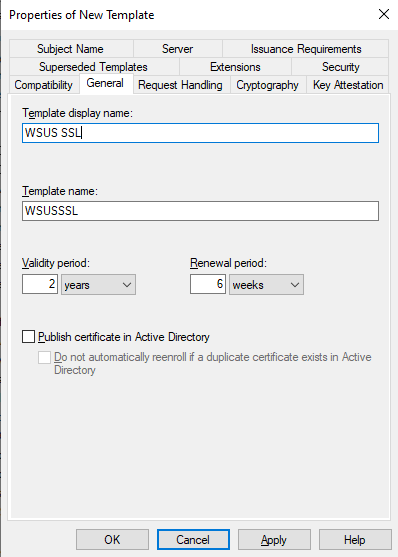
- General: Assign a clear, descriptive name for the template (e.g., WSUS SSL Certificate).
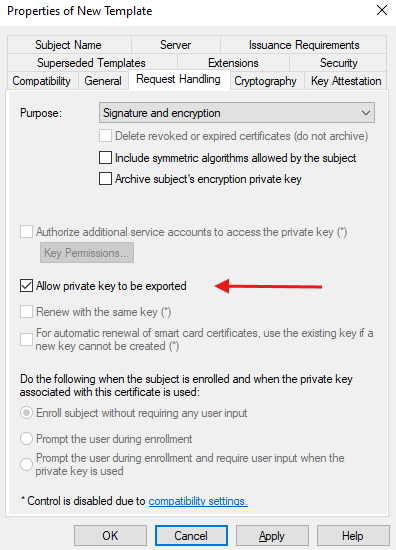
- Request Handling: Make sure “Allow private key to be exported” is checked.
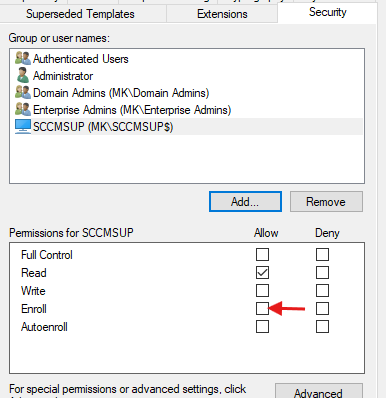
- Configure Security Permissions
- Under the Security tab, click Add and search for Computers.
- Select the WSUS server computer account.
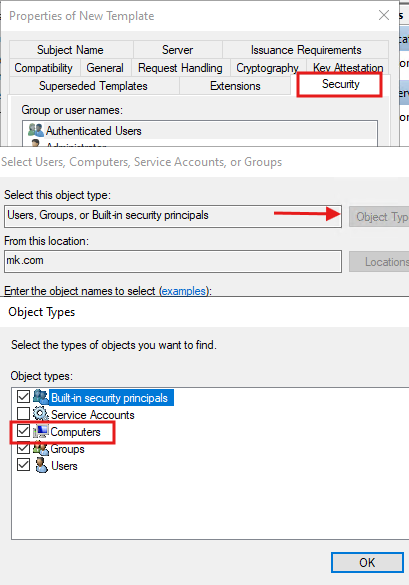
- Grant the WSUS server Enroll permission.
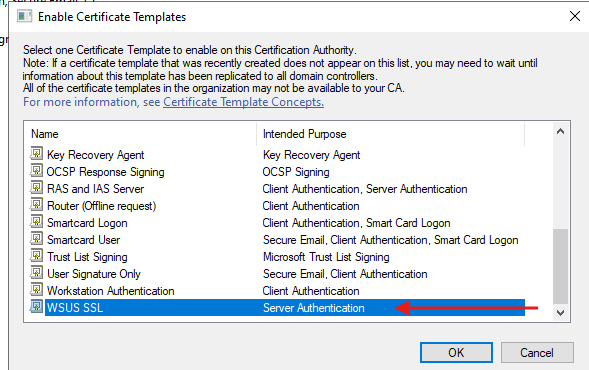
- Enable the Template
- Go back to the Certificate Templates section in the CA console.
- Right-click Certificate Templates, then select New → Certificate Template to Issue.
- Choose the newly created template and enable it.
At this point, your custom WSUS SSL Certificate Template is ready to be requested and enrolled by the WSUS server.
Step 2: Requesting the WSUS SSL Certificate and Configuring IIS Bindings
Once the certificate template is created and published in the CA, the next step is to request and install the SSL certificate on the WSUS server. After enrollment, we’ll configure IIS bindings and enforce SSL settings for WSUS services, followed by running wsusutil.exe to finalize the secure configuration.
2.1 Requesting the WSUS SSL Certificate
- Open the Certificates Console
- On the WSUS server, press
Win + R, typecertlm.msc, and press Enter. - This opens the Local Computer Certificates snap-in.
- On the WSUS server, press
- Start Certificate Enrollment
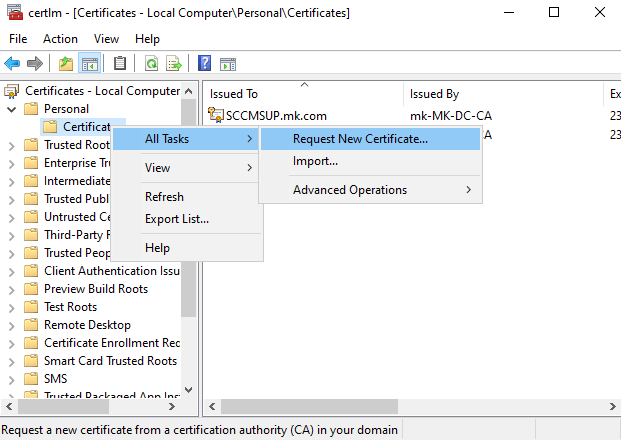
- Navigate to Personal → Certificates.
- Right-click and select All Tasks → Request New Certificate.
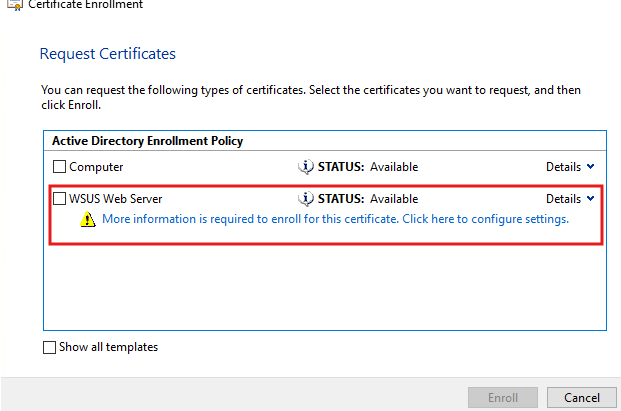
- Select the WSUS Web Server Template
- In the Enrollment wizard, you should now see the WSUS Web Server certificate we created earlier.
- It may show a warning: “More information is required to enroll”.
- Click on it to provide the required details.
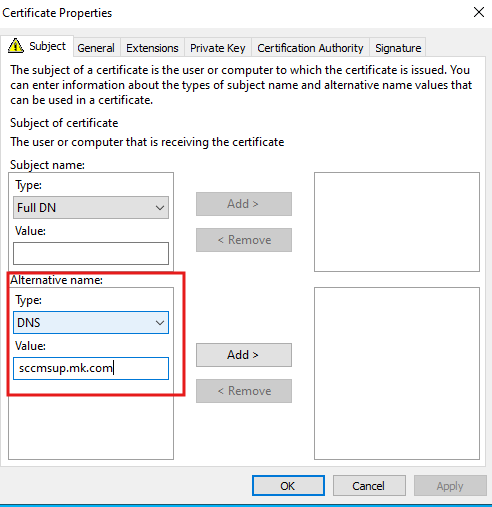
- Configure Certificate Details
- Under the Subject tab, select Alternative Name → DNS.
- Enter the FQDN of your WSUS server (e.g.,
wsus.domain.com).
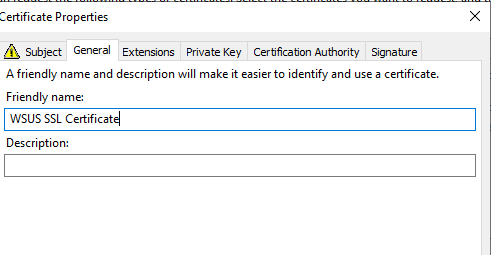
- Under the General tab, provide a Friendly Name for easier identification (e.g., WSUS SSL Certificate).
- Enroll the Certificate
- Click OK, then proceed with the enrollment process.
- Once complete, you should see the new WSUS SSL certificate listed in the Local Computer store.

2.2 Configure IIS Bindings for WSUS
- Open IIS Manager
- Launch Internet Information Services (IIS) Manager on the WSUS server.
- Launch Internet Information Services (IIS) Manager on the WSUS server.
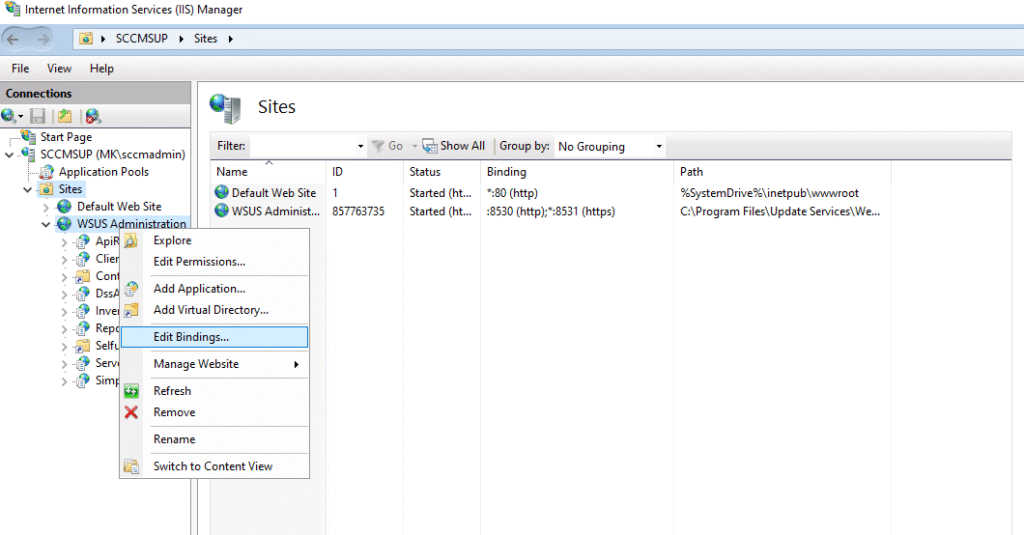
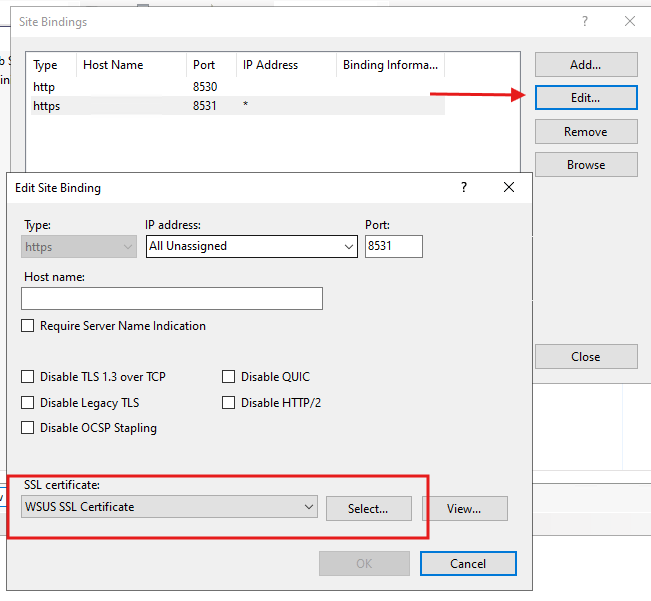
- Bind the SSL Certificate to WSUS
- In the left pane, expand Sites → WSUS Administration.
- Select Bindings…, then edit the HTTPS entry.
- From the SSL certificate dropdown, select the enrolled WSUS SSL certificate.
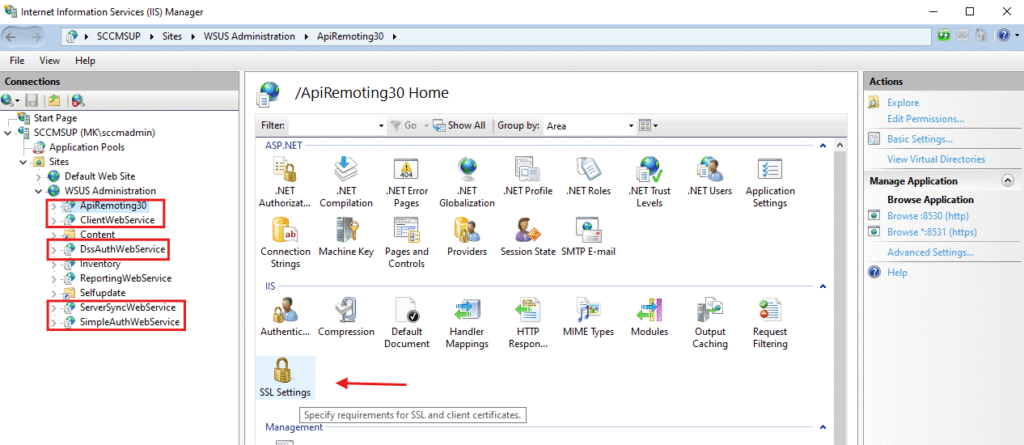
2.3 Enforce SSL for WSUS Web Services
In the WSUS Administration site, configure SSL for the following sub-sites:
- ApiRemoting30
- DssAuthWebService
- ServerSyncWebService
- SimpleAuthWebService
For each service:
- Go to SSL Settings.
- Check “Require SSL”.
- Click Apply.
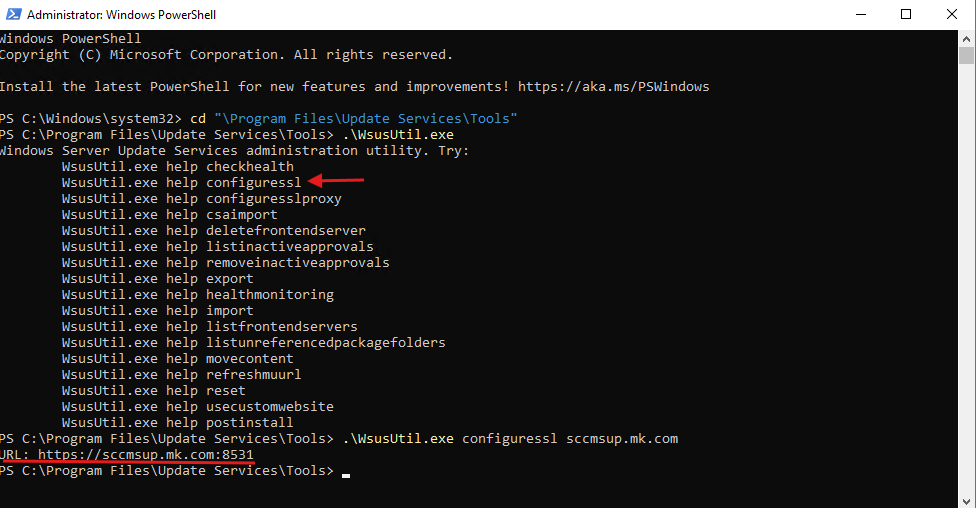
2.4 Finalize with WSUSUTIL
Finally, configure WSUS to use SSL:
- Open Command Prompt as Administrator.
- Navigate to the WSUS tools directory:
cd "C:\Program Files\Update Services\Tools" - Run the following command:
wsusutil.exe configuressl wsus.domain.com (Replace wsus.domain.com with your WSUS server FQDN) - If successful, the WSUS URL should now be updated to use HTTPS.
At this stage, WSUS is now fully configured to communicate over SSL, ensuring encrypted synchronization between SCCM and WSUS.
Step 3: Installing and Configuring the Software Update Point (SUP) Role in SCCM
With the WSUS SSL certificate successfully enrolled and IIS configured, the final step is to set up the Software Update Point (SUP) role in SCCM 2503. This role integrates WSUS into SCCM, enabling centralized management, synchronization, and deployment of updates across your enterprise environment.
Follow the steps below to configure the SUP role:
3.1 Add a New Site System Server
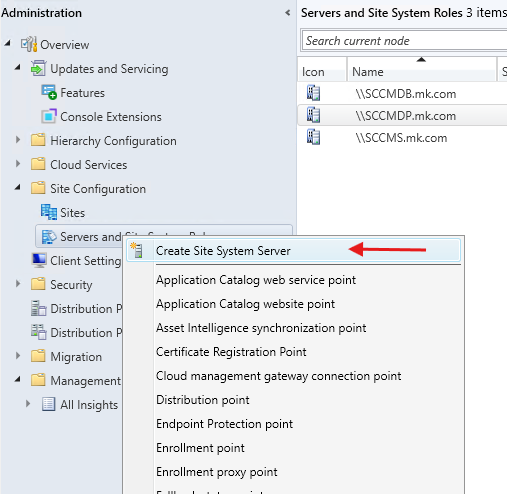
- Open the SCCM Console.
- Navigate to Administration → Site Configuration → Servers and Site System Roles.
- Right-click and select Create Site System Server.
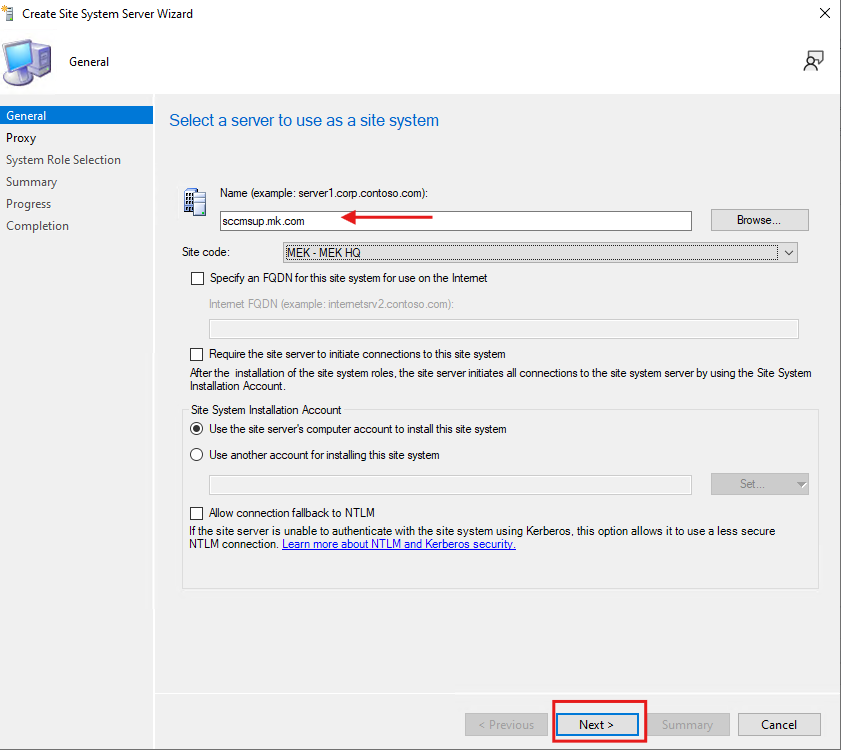
3.2 Select the WSUS Server
- In the Specify a site system server window, enter or select your WSUS server.
- Click Next to continue.
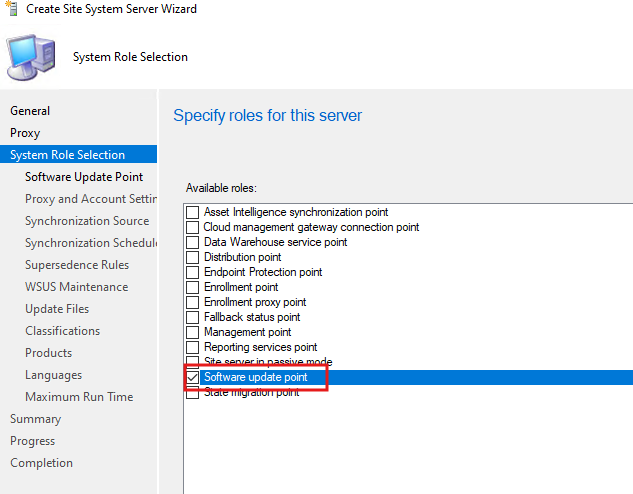
3.3 Install the Software Update Point Role
- In the System Role Selection screen, check Software Update Point.
- Click Next.
3.4 Configure SUP Settings
- In the Software Update Point Settings window, enable:
- Require SSL communication to the WSUS server
(Important for secure data exchange)
- Require SSL communication to the WSUS server

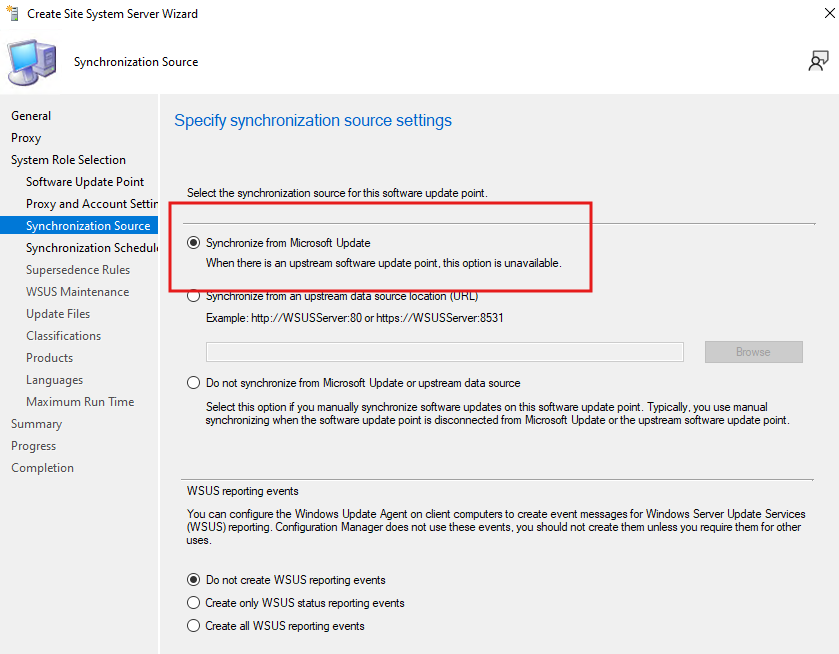
- On the Synchronization Source screen, select:
- Synchronize from Microsoft Update
- Synchronize from Microsoft Update
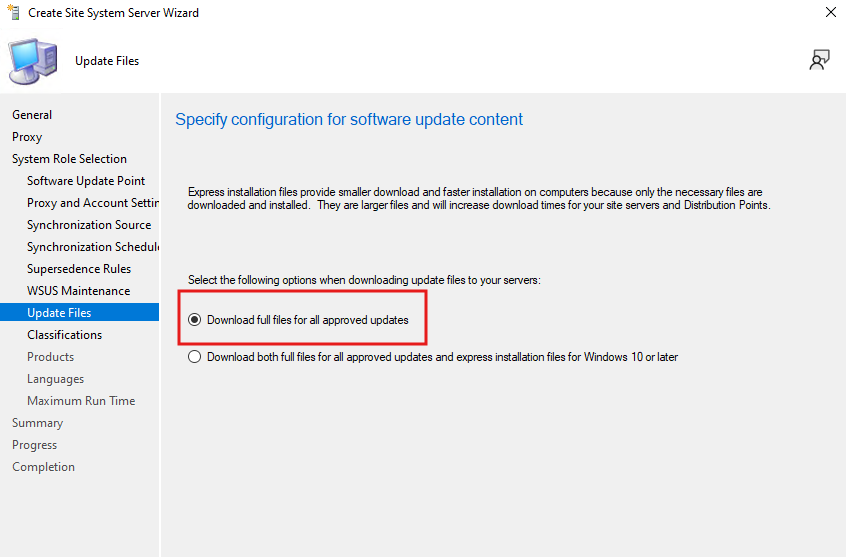
- On the Update Files screen, choose:
- Download full files for all approved updates
(Ensures the entire update package is available for deployment)
- Download full files for all approved updates
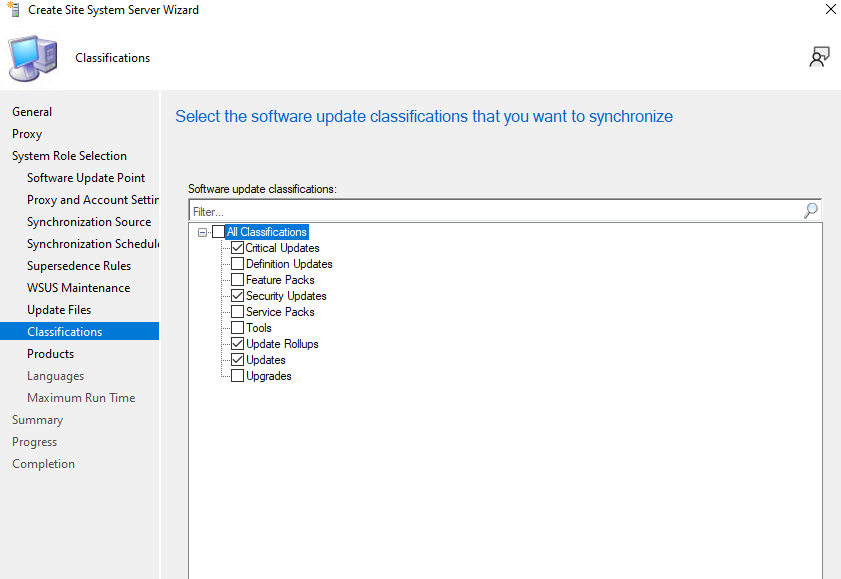
- On the Classifications screen, check the following options:
- Critical Updates
- Security Updates
- Update Rollups
- Updates
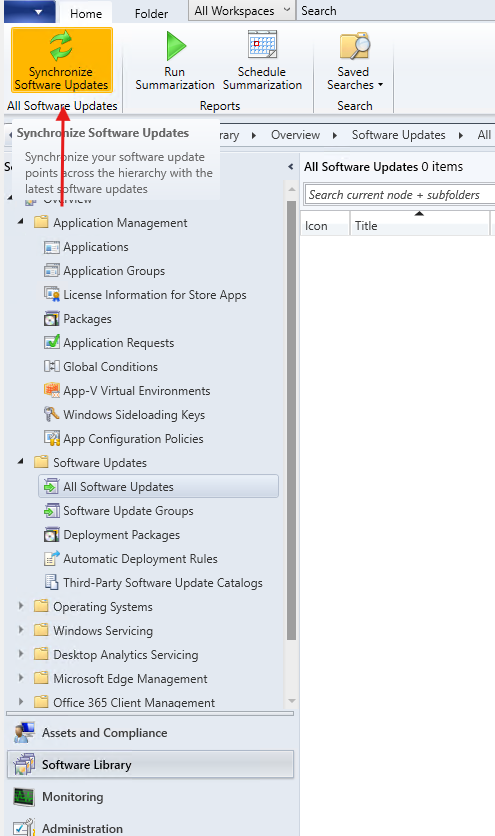
3.5 Synchronize Software Updates
- Once configuration is complete, go to the Software Library → Software Updates node in the SCCM console.
- Click Synchronize Software Updates to initiate the first synchronization with Microsoft Update.
- Monitor the progress in the wsyncmgr.log to verify successful synchronization.
Conclusion
By configuring the Software Update Point (SUP) with WSUS SSL in SCCM 2503, you create a secure and scalable foundation for enterprise patch management. This setup ensures encrypted communication, reliable update synchronization, and improved compliance helping your IT environment stay stable, protected, and ready for enterprise deployment.
Source : Configure a software update point to use TLS/SSL with a PKI certificate