SCCM Distribution Point Content Sync Made Easy with PowerShell
When you add a new Distribution Point (DP) in SCCM, one of the first things you need to do is make sure it has the same content as your existing DPs. Doing that manually can take forever especially if you’ve got dozens or hundreds of packages.
To simplify the process, I wrote a PowerShell script that lets you copy all content from one DP to another in just a few steps. It’s fully interactive, shows live progress, and creates detailed logs so you can see exactly what happened.
In this post, I’ll walk you through how the script works step by step so you can easily apply it in your own environment.
What the Script Does
- Lists all Distribution Points in your site
- Lets you pick a Source DP (where the content already exists) and a Target DP (the new one)
- Distributes all content types Applications, Packages, Boot/OS/Driver Images, Updates, and Task Sequences
- Shows real-time progress for each item
- Logs every action and provides a summary when done
Step 1 – Check the Starting Point
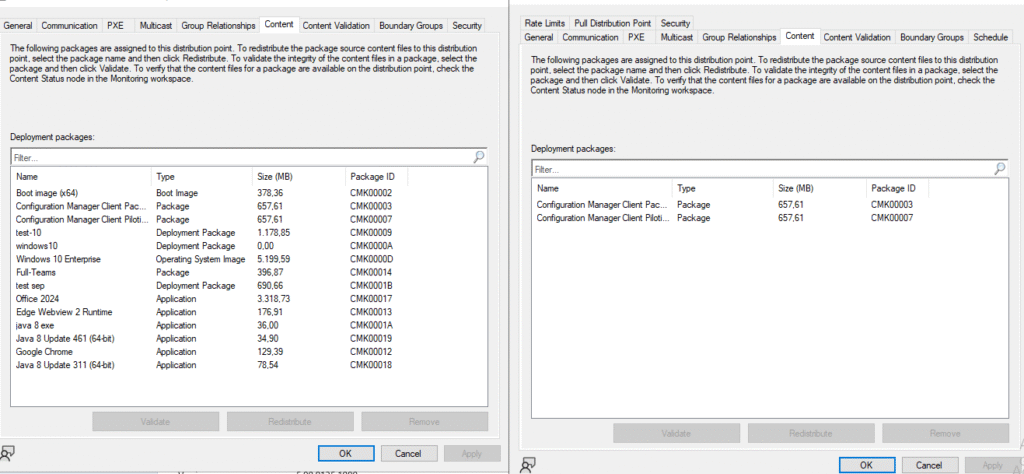
Before running anything, make sure your source DP already hosts the content you want to copy, and that the target DP is clean. This helps you clearly see what changes after the sync.
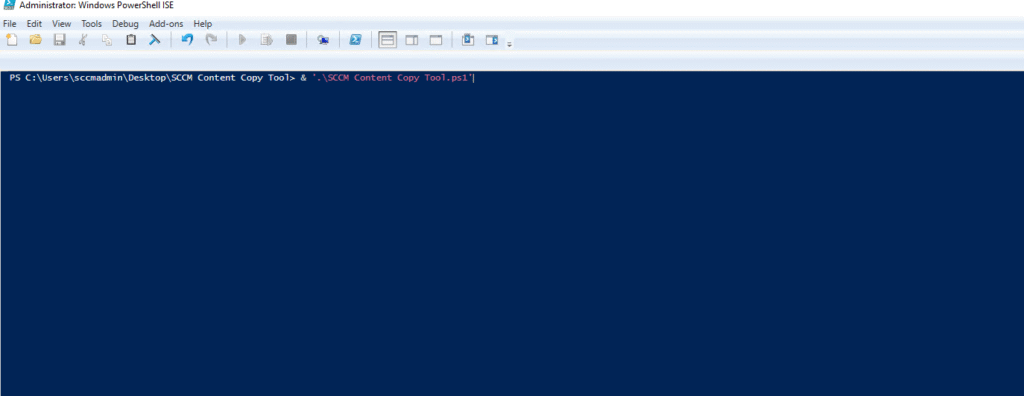
Step 2 Run the Script as Administrator
Open PowerShell as Administrator, navigate to the folder where the script is stored, and run it directly:
.\\SCCM-DP-Content-Sync.ps1
No extra parameters or setup are needed — the script is completely interactive.
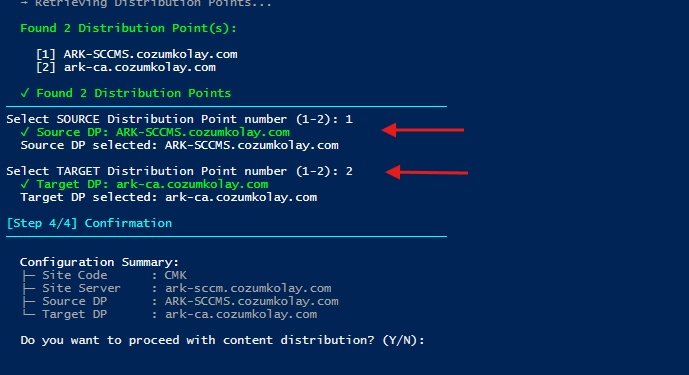
Step 3 – Enter Site Details
The script first asks for your Site Code and Site Server (for example, ABC and SCCMServer.domain.local). Once entered, it connects to your site and lists all available Distribution Points.
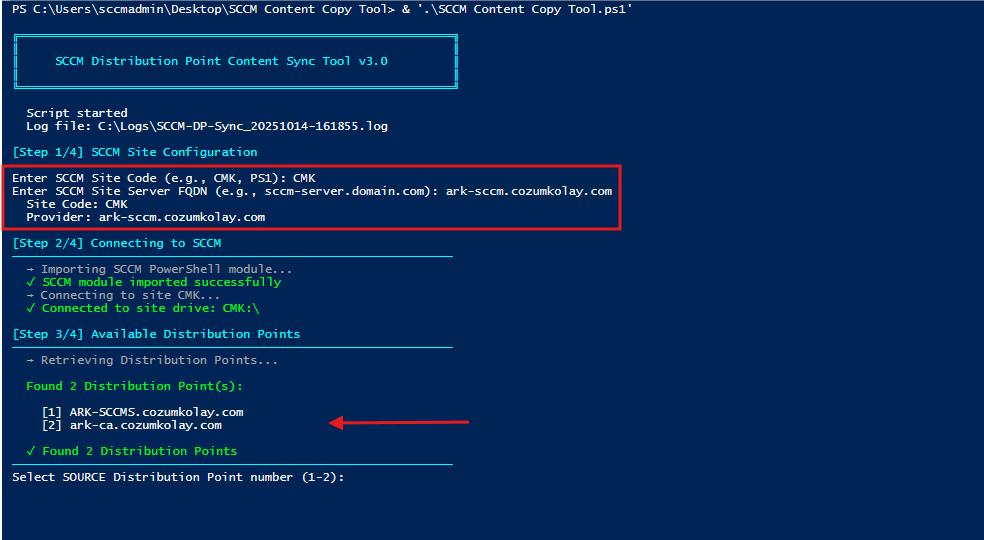
Step 4 – Choose Source and Target DPs
After discovering all DPs, the script displays them in a numbered list. You just pick the Source (existing DP) and Target (new DP), then confirm when prompted. This extra confirmation step helps avoid sending content to the wrong DP by mistake.
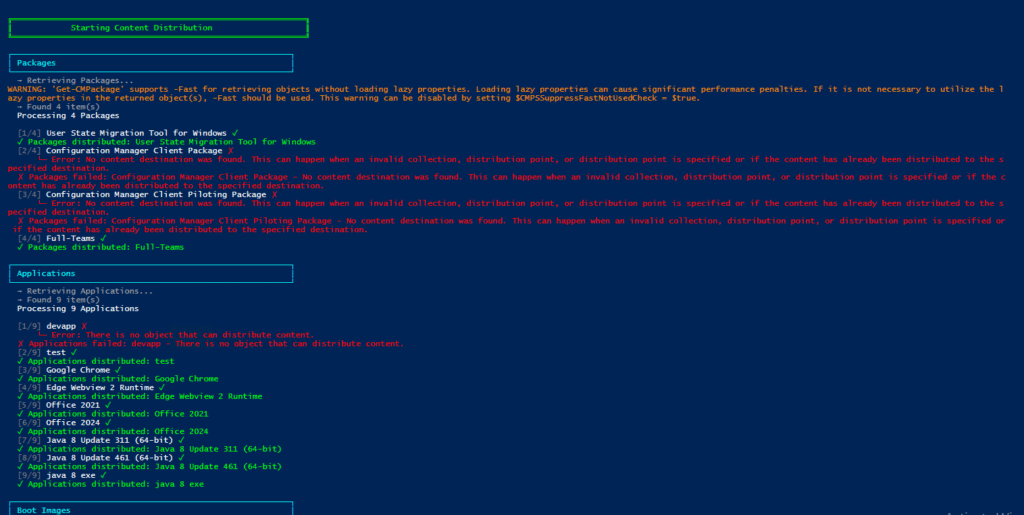
Step 5 – Watch the Progress
Once confirmed, the script starts processing all content. You’ll see live updates for each item, including success or failure messages.
If something fails, the script logs it and keeps going — no need to restart from scratch. This makes it reliable for environments with large content libraries.
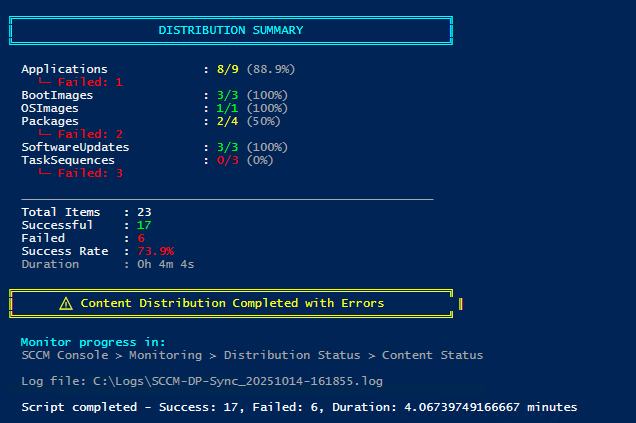
Step 6 — Review the Summary
At the end of the run, the script prints a summary showing how many items were processed, succeeded, or failed, plus a total success rate. Perfect for a quick check before diving into details.
Example:
Applications: 20/20 (100%)
Packages: 45/47 (95%)
Total Success Rate: 97.8%
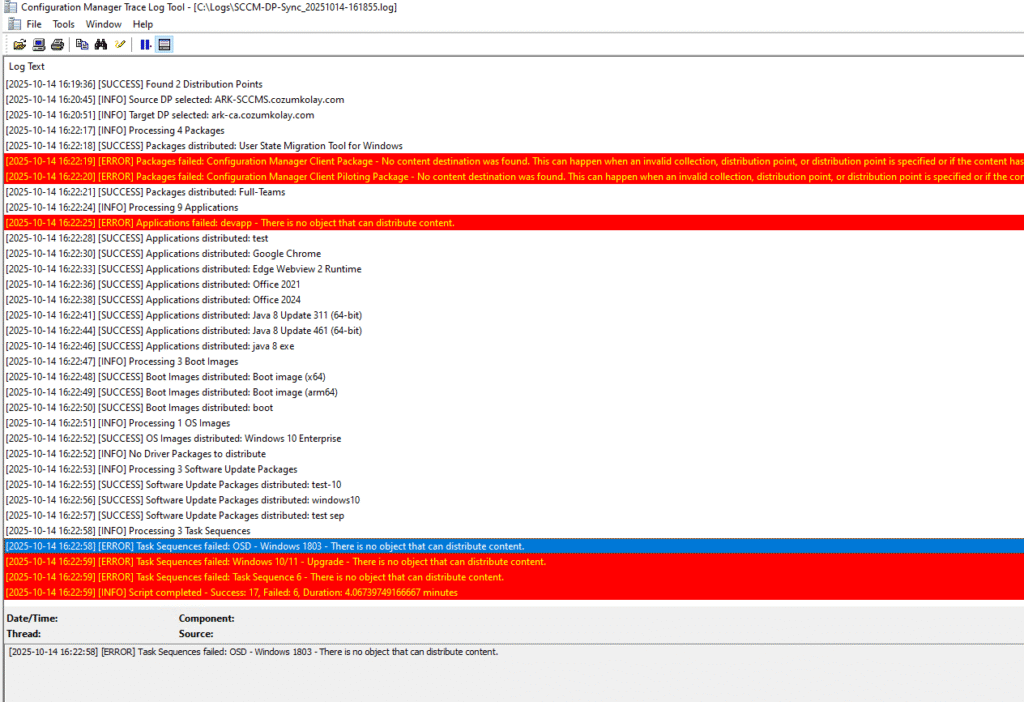
Step 7 – Check the Log
Everything that happens is written into a detailed log file (by default in C:\Logs). This file includes timestamps, errors, and status messages for each content item.
If something failed, you can open the log, find the affected item, and troubleshoot easily.
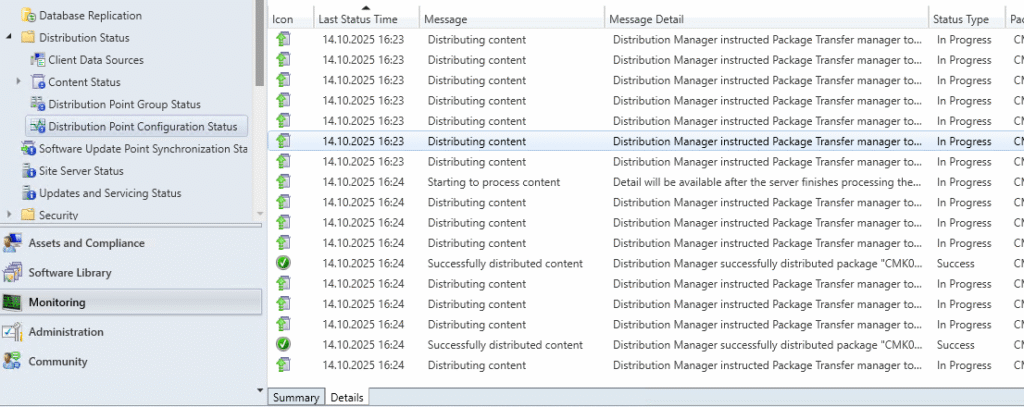
Step 8 – Verify in SCCM Console
Finally, open the SCCM Console → Monitoring → Distribution Point Configuration Status. You should see your target DP receiving the packages and updates. That’s the confirmation everything worked as expected.
You can also monitor distmgr.log and pkgxfermgr.log on the site server if you want a deeper look at what SCCM is doing in the background.
Troubleshooting Tips
- SCCM module not found: Run the script from a machine with the SCCM Console installed.
- Connection issues: Check your site code, FQDN, and network access.
- Some items fail: Make sure the source DP actually hosts that content and the target has enough disk space.
- Nothing shows up on target: Confirm the DP is properly configured in SCCM and added to the right boundary groups.
Using this PowerShell script makes copying content between Distribution Points much easier and more reliable. You get a clear view of progress in real time, detailed logs for troubleshooting, and a straightforward way to ensure your new DP has all the content it needs.
No more manual copying, no more guessing — just a simple, repeatable process that saves time and reduces errors.
If you want to try the script yourself and see how it works, check it out here: GitHub