
How to Migrate Windows 10 to Windows 11 with Microsoft Intune
If you’re managing Windows devices through Intune, deploying Windows 11 is actually pretty straightforward. Unlike SCCM where you build task sequences and deal with distribution points, Intune uses Feature Update policies that leverage Windows Update for Business.
In this guide, I’ll walk through the entire process I used to migrate devices from Windows 10 to Windows 11 25H2 using Intune. The deployment method here is cloud-native – no on-premises infrastructure needed. Intune handles everything through Azure AD groups and Windows Update policies.
Prerequisites
Before you start:
- Intune subscription (comes with M365 E3/E5 or standalone)
- Devices enrolled in Intune and Azure AD joined
- Admin rights in Intune (Intune Administrator or Global Admin)
- Devices meeting Windows 11 hardware requirements (TPM 2.0, UEFI, Secure Boot)
- Azure AD groups for your pilot/deployment phases
I’d recommend starting with a small pilot group – maybe 10-20 devices from IT or early adopters. That’s what I did here.
Creating the Feature Update Policy
Feature update policies control which Windows version gets deployed.
Step 1: Navigate to Feature Updates
Log into the Intune admin center and go to Devices > Windows > Windows updates > Feature updates. This is where you’ll see all your feature update deployments. Initially it’s empty, with a prompt to create your first policy.
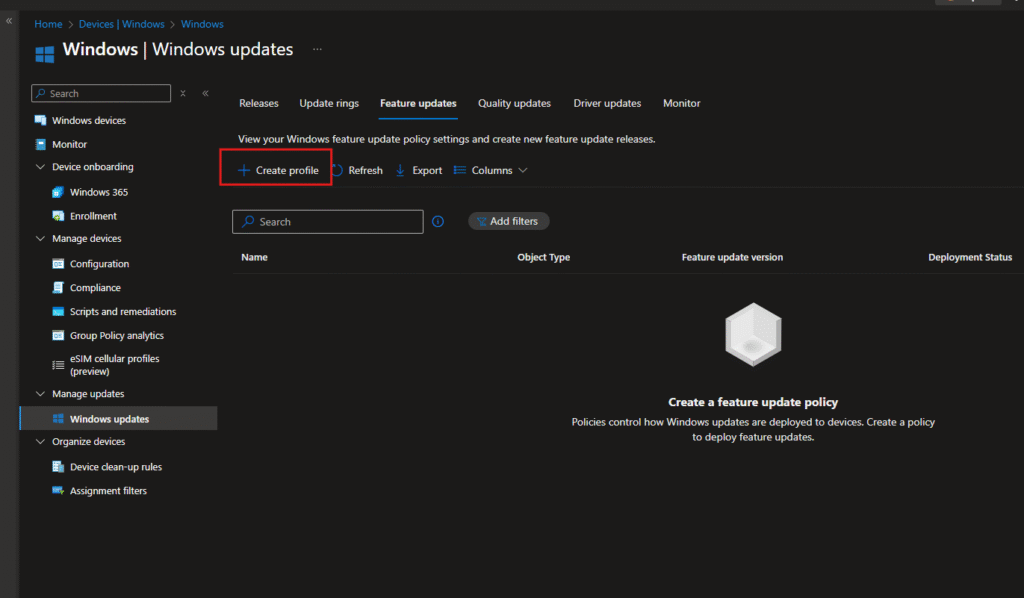
Step 2: Create the Deployment Profile
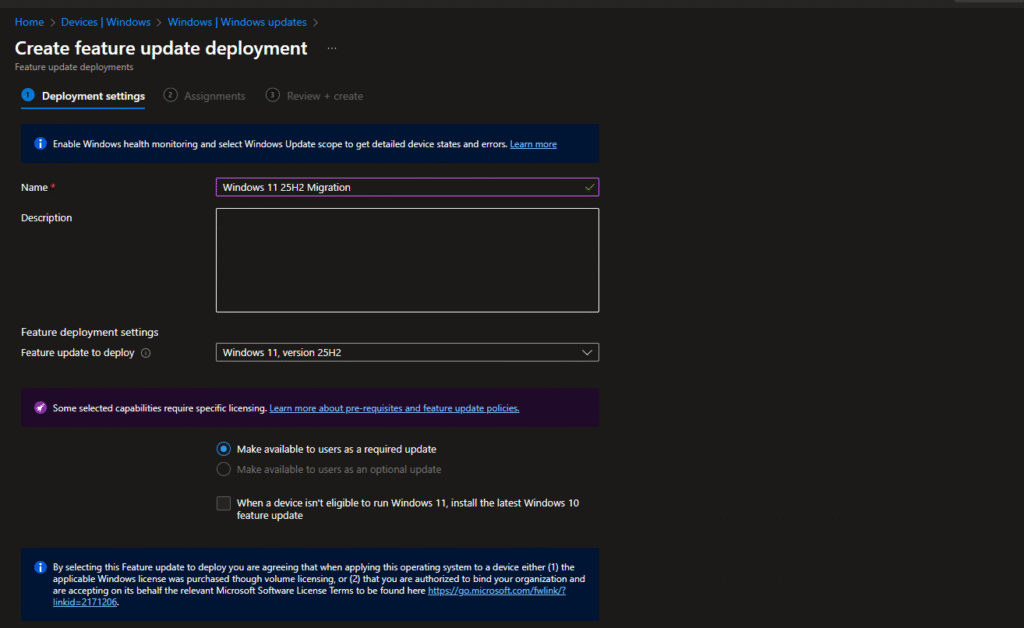
Here’s what I configured:
Name: Windows 11 25H2 Migration
Feature update to deploy: Selected Windows 11, version 25H2 from the dropdown
Rollout options: Chose “Make available to users as a required update” – this makes it mandatory, users can’t skip it indefinitely.
I also checked the box for “When a device isn’t eligible to run Windows 11, install the latest Windows 10 feature update”. This is useful if you have older hardware that doesn’t meet Win11 requirements – they’ll at least get the latest Win10 version.
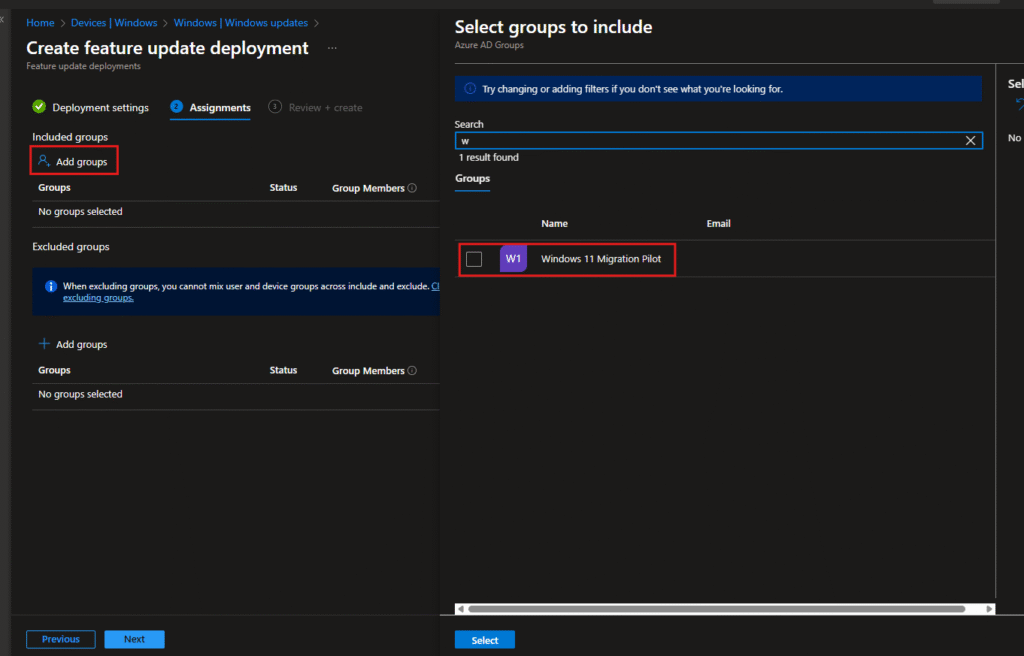
Step 3: Assign to Target Groups
This is where you define who gets the update. I clicked Add groups and searched for my pilot group.
In my case, I had created an Azure AD group called “Windows 11 Migration Pilot” with just one test device for this demo.
Selected the group and clicked Select.
Step 4: Review and Create
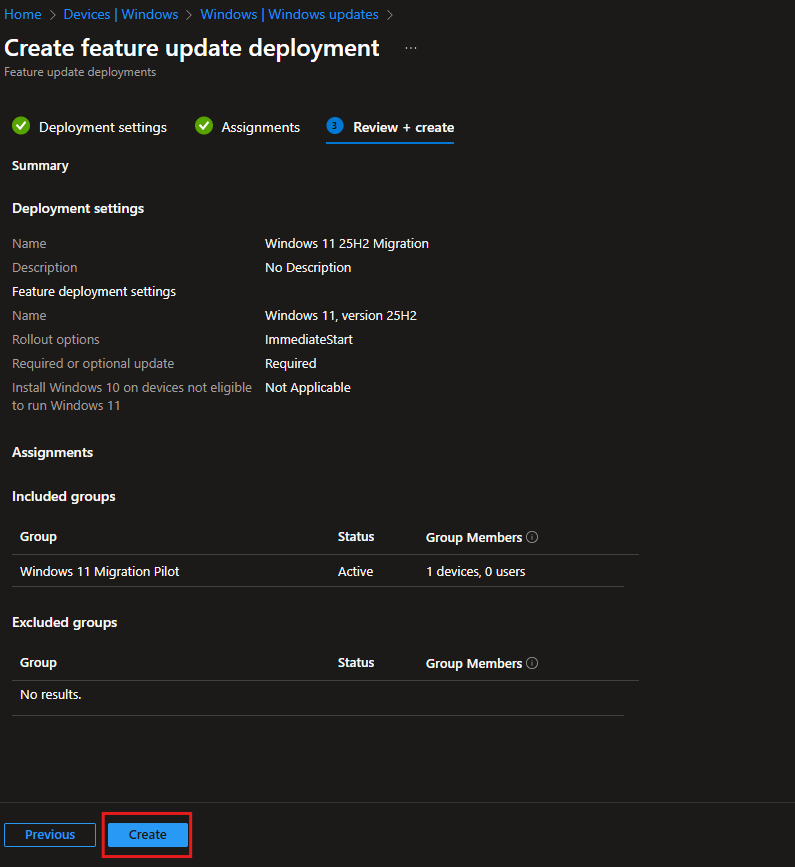
Review everything:
- Feature update version: Windows 11, version 25H2
- Rollout: ImmediateStart
- Required: Yes
- Assigned group: Windows 11 Migration Pilot (1 device)
Looks good, so I clicked Create.
Setting Up Update Rings
Now we need an Update Ring. While the feature update policy controls “what” gets deployed, the update ring controls “how” and “when”.
Step 5: Navigate to Update Rings
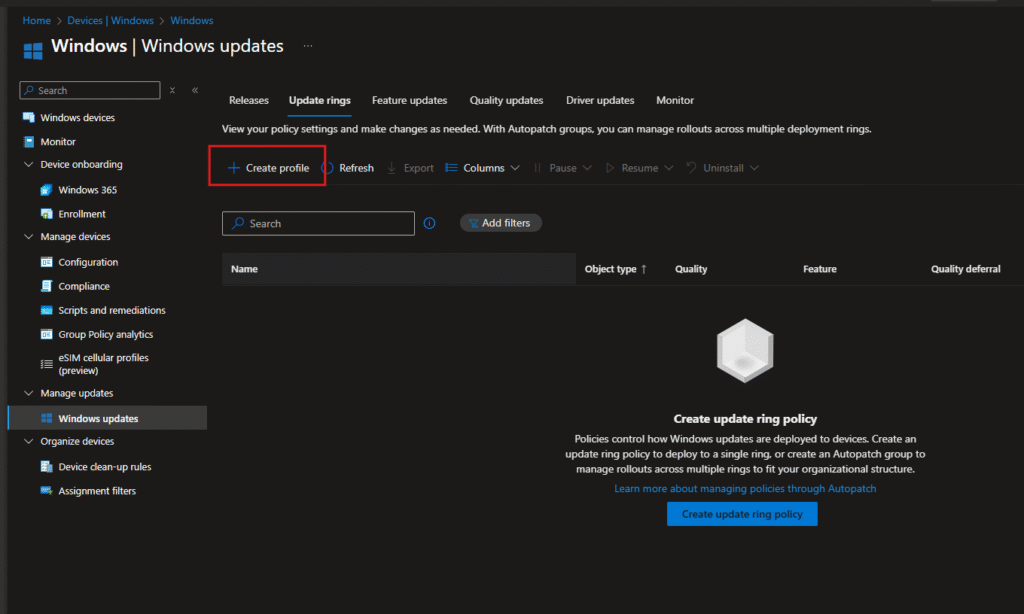
Go back to Devices > Windows > Windows updates and switch to the Update rings tab.
Click Create profile.
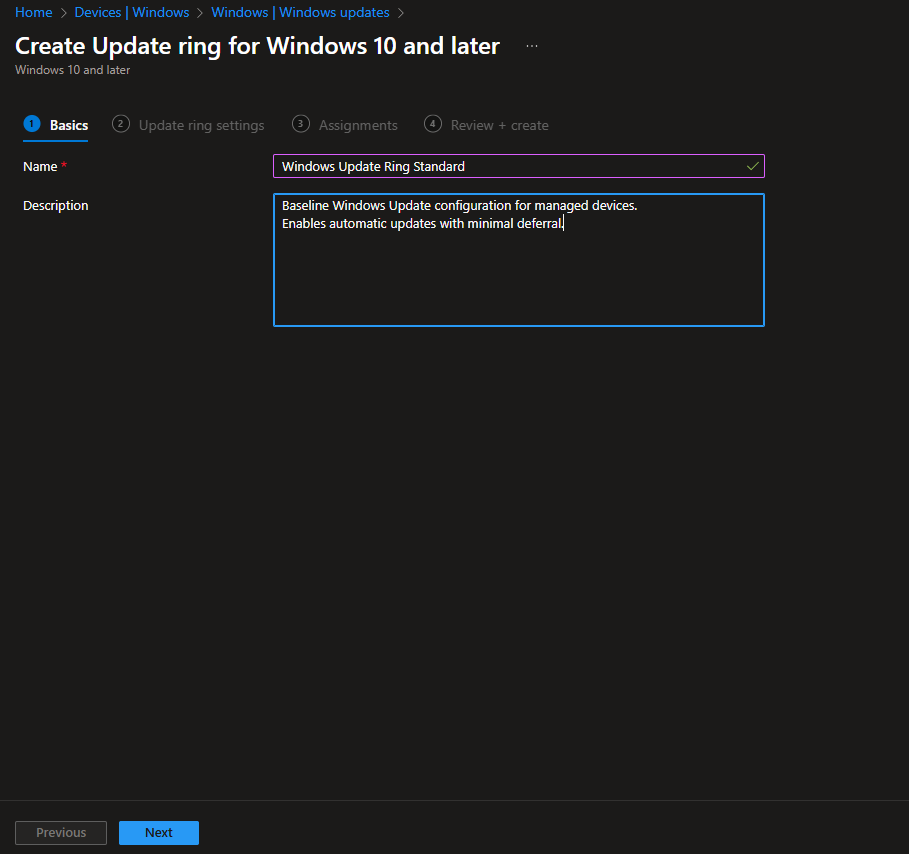
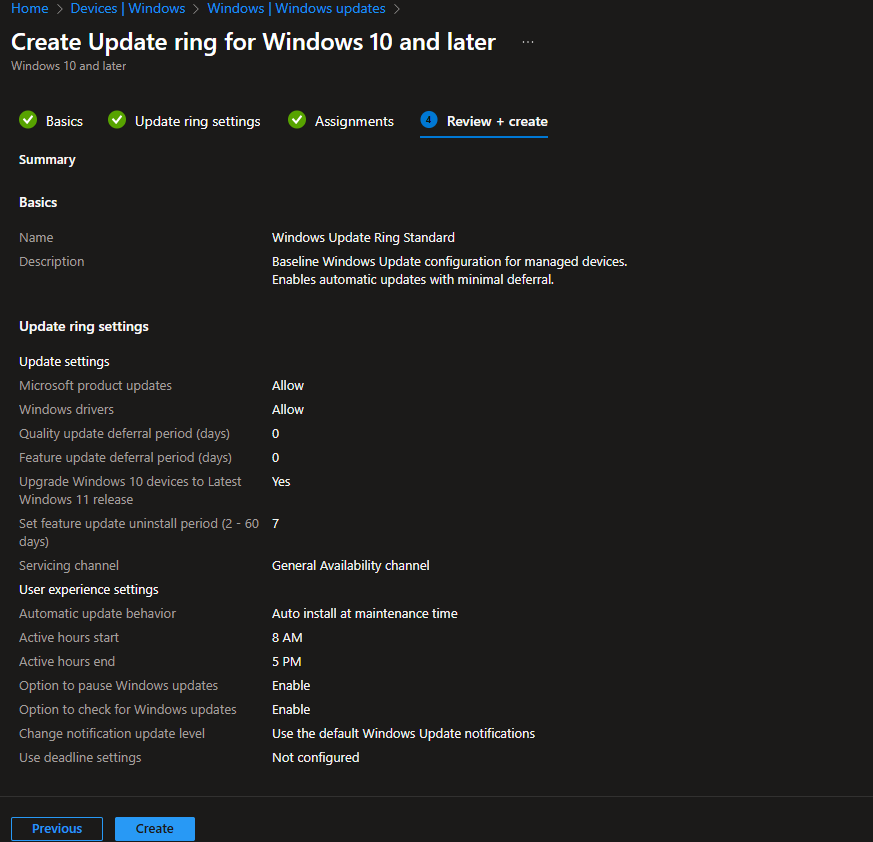
Step 6: Configure Basic Settings
Name: Windows Update Ring Standard
Description: I added details about what this ring does – baseline config for managed devices, immediate security updates, 7-day uninstall window, etc.
Click Next.
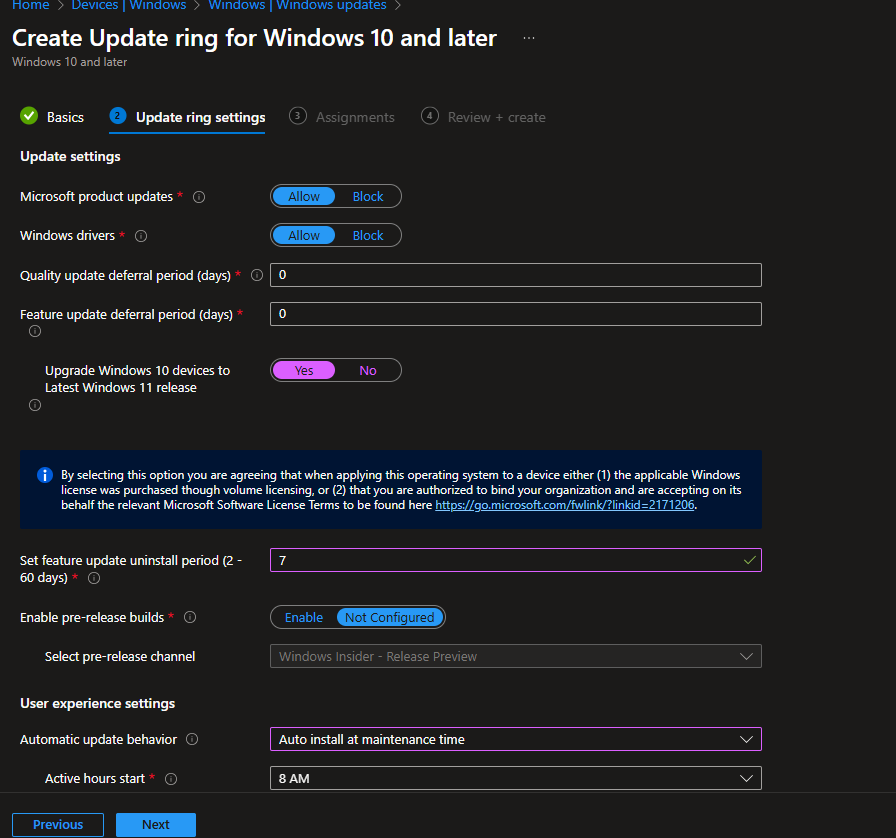
Step 7: Configure Update Ring Settings
This page has a lot of options. Here’s what I set:
Update Settings:
- Microsoft product updates: Allow
- Windows drivers: Allow
- Quality update deferral: 0 days (security patches should install immediately)
- Feature update deferral: 0 days (we’re controlling this with the feature update policy)
- Upgrade Windows 10 to Windows 11: Yes
- Feature update uninstall period: 7 days (gives you a week to roll back if needed)
User Experience:
- Automatic update behavior: Auto install at maintenance time
- Active hours start: 8 AM
- Active hours end: 5 PM
The 7-day uninstall period is important – it’s your safety net. If something breaks after the upgrade, users can roll back within that window.
Click Next.
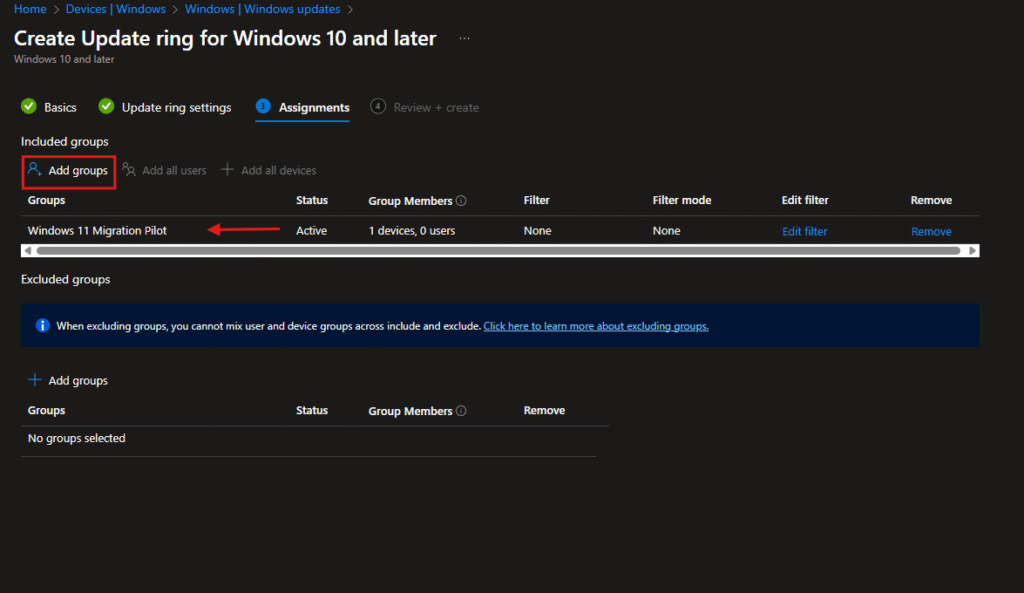
Step 8: Assign the Update Ring
Just like with the feature update policy, I assigned this to the same “Windows 11 Migration Pilot” group.
Important: Both policies need to target the same devices. The feature update policy delivers Windows 11, and the update ring controls how it’s installed.
Click Next.
Step 9: Review and Create
Double-check everything:
- All the deferral settings
- User experience config
- Group assignments
Click Create.
Now both policies are deployed. Devices in the target group will get these policies on their next check-in (usually within 8 hours, but you can force it sooner).
Client-Side Experience
Let’s see what happens on the actual device after policies are deployed.
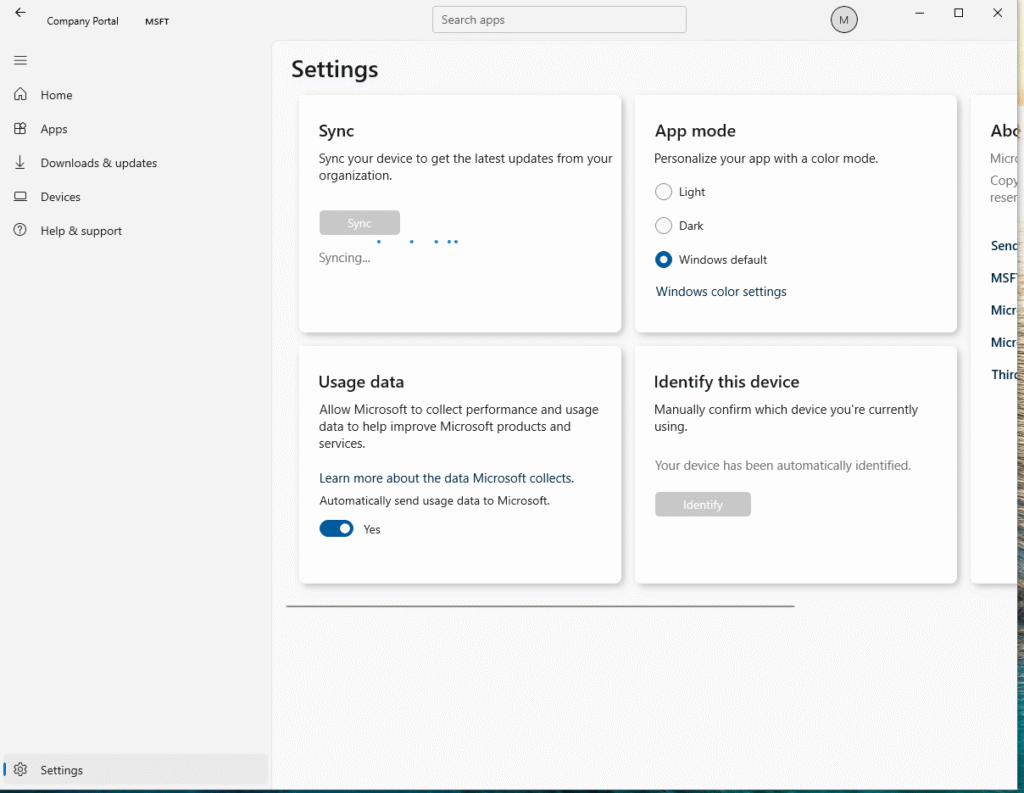
Step 10: Sync Policies on the Device
On the client machine, I opened the Company Portal app.
Went to Settings and clicked Sync. This forces the device to check in with Intune immediately and pull down any new policies.You’ll see “Syncing…” with a progress indicator. Takes about 30 seconds to complete.After the sync completes, give it another 5-10 minutes for Windows Update to process the new policies.
Step 11: Check Windows Update
Now when I opened Settings > Update & Security > Windows Update, here’s what I saw:
Notice a few things:
- “Some settings are managed by your organisation” at the top
- Windows 11, version 25H2 is showing as available
- Status shows “Downloading – 0%”
- The update is being enforced by policy
The download will proceed automatically based on the update ring settings I configured (auto install at maintenance time, respect active hours, etc).
The entire process usually takes 30-45 minutes.

Monitoring the Deployment
After deployment starts, you’ll want to track progress back in Intune.
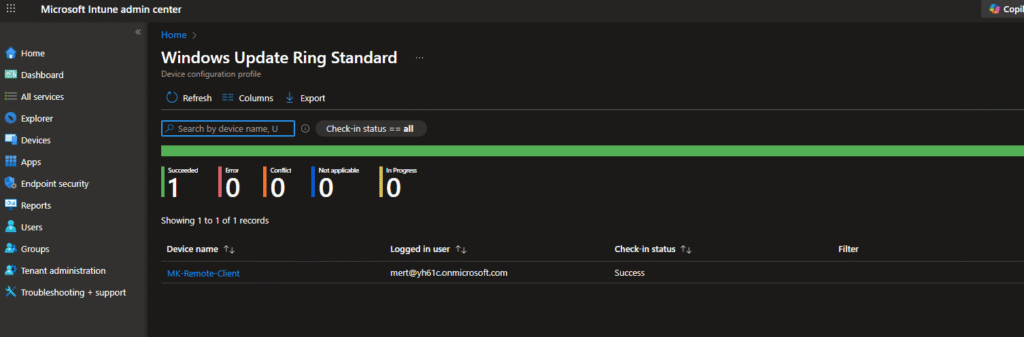
Step 12: Check Deployment Status
Back in Intune, go to your update ring policy.
You’ll see check-in status:
- Succeeded: 1 device
- Errors: 0
- Conflicts: 0
Below that, you can see device details – in this case “MK-Remote-Client” shows a successful check-in.
You can filter by status and see exactly which devices have applied the policy, which failed, etc.
For larger deployments, I usually check this dashboard twice a day during the pilot phase, then daily during broader rollout.
Intune vs SCCM – When to Use Which
Since I’ve written about both methods, here’s my take on when to use each:
Use Intune when:
- You’re cloud-first or remote workforce
- You want simple, policy-based deployment
- You don’t need complex customization
- You want to minimize infrastructure
Use SCCM when:
- You need task sequence control
- You want to inject drivers, apps during upgrade
- You have on-premises requirements
- You need detailed customization
Use both (co-management) when:
- You’re transitioning from on-prem to cloud
- You want flexibility
- Different device groups have different needs
For most modern organizations, Intune is sufficient and much easier to manage.
That’s the complete process for migrating Windows 10 to 11 using Intune. The key components are:
- Feature update policy (defines what gets deployed)
- Update ring (defines how it gets deployed)
- Azure AD groups (defines who gets it)
- Monitoring (making sure it’s working)
The whole thing is pretty simple once you understand how the pieces fit together. Start small with a pilot, monitor carefully, and expand gradually.
The nice thing about Intune is that this same process applies to all future Windows feature updates. Set it up once, and you’ve got a repeatable process for ongoing OS management. Check out my previous guide on migrating with Configuration Manager completely different approach but might be better for your environment.

